Vegan Berry Cheesecake Cups (Fruit-Sweetened)

These nutritious no-bake cheesecake cups are vegan, gluten-free and fruit-sweetened. Top them with your favorite berries or fruit jam!

prep time

20 minutes

cook time

servings

9
vegan berry cheesecake cups

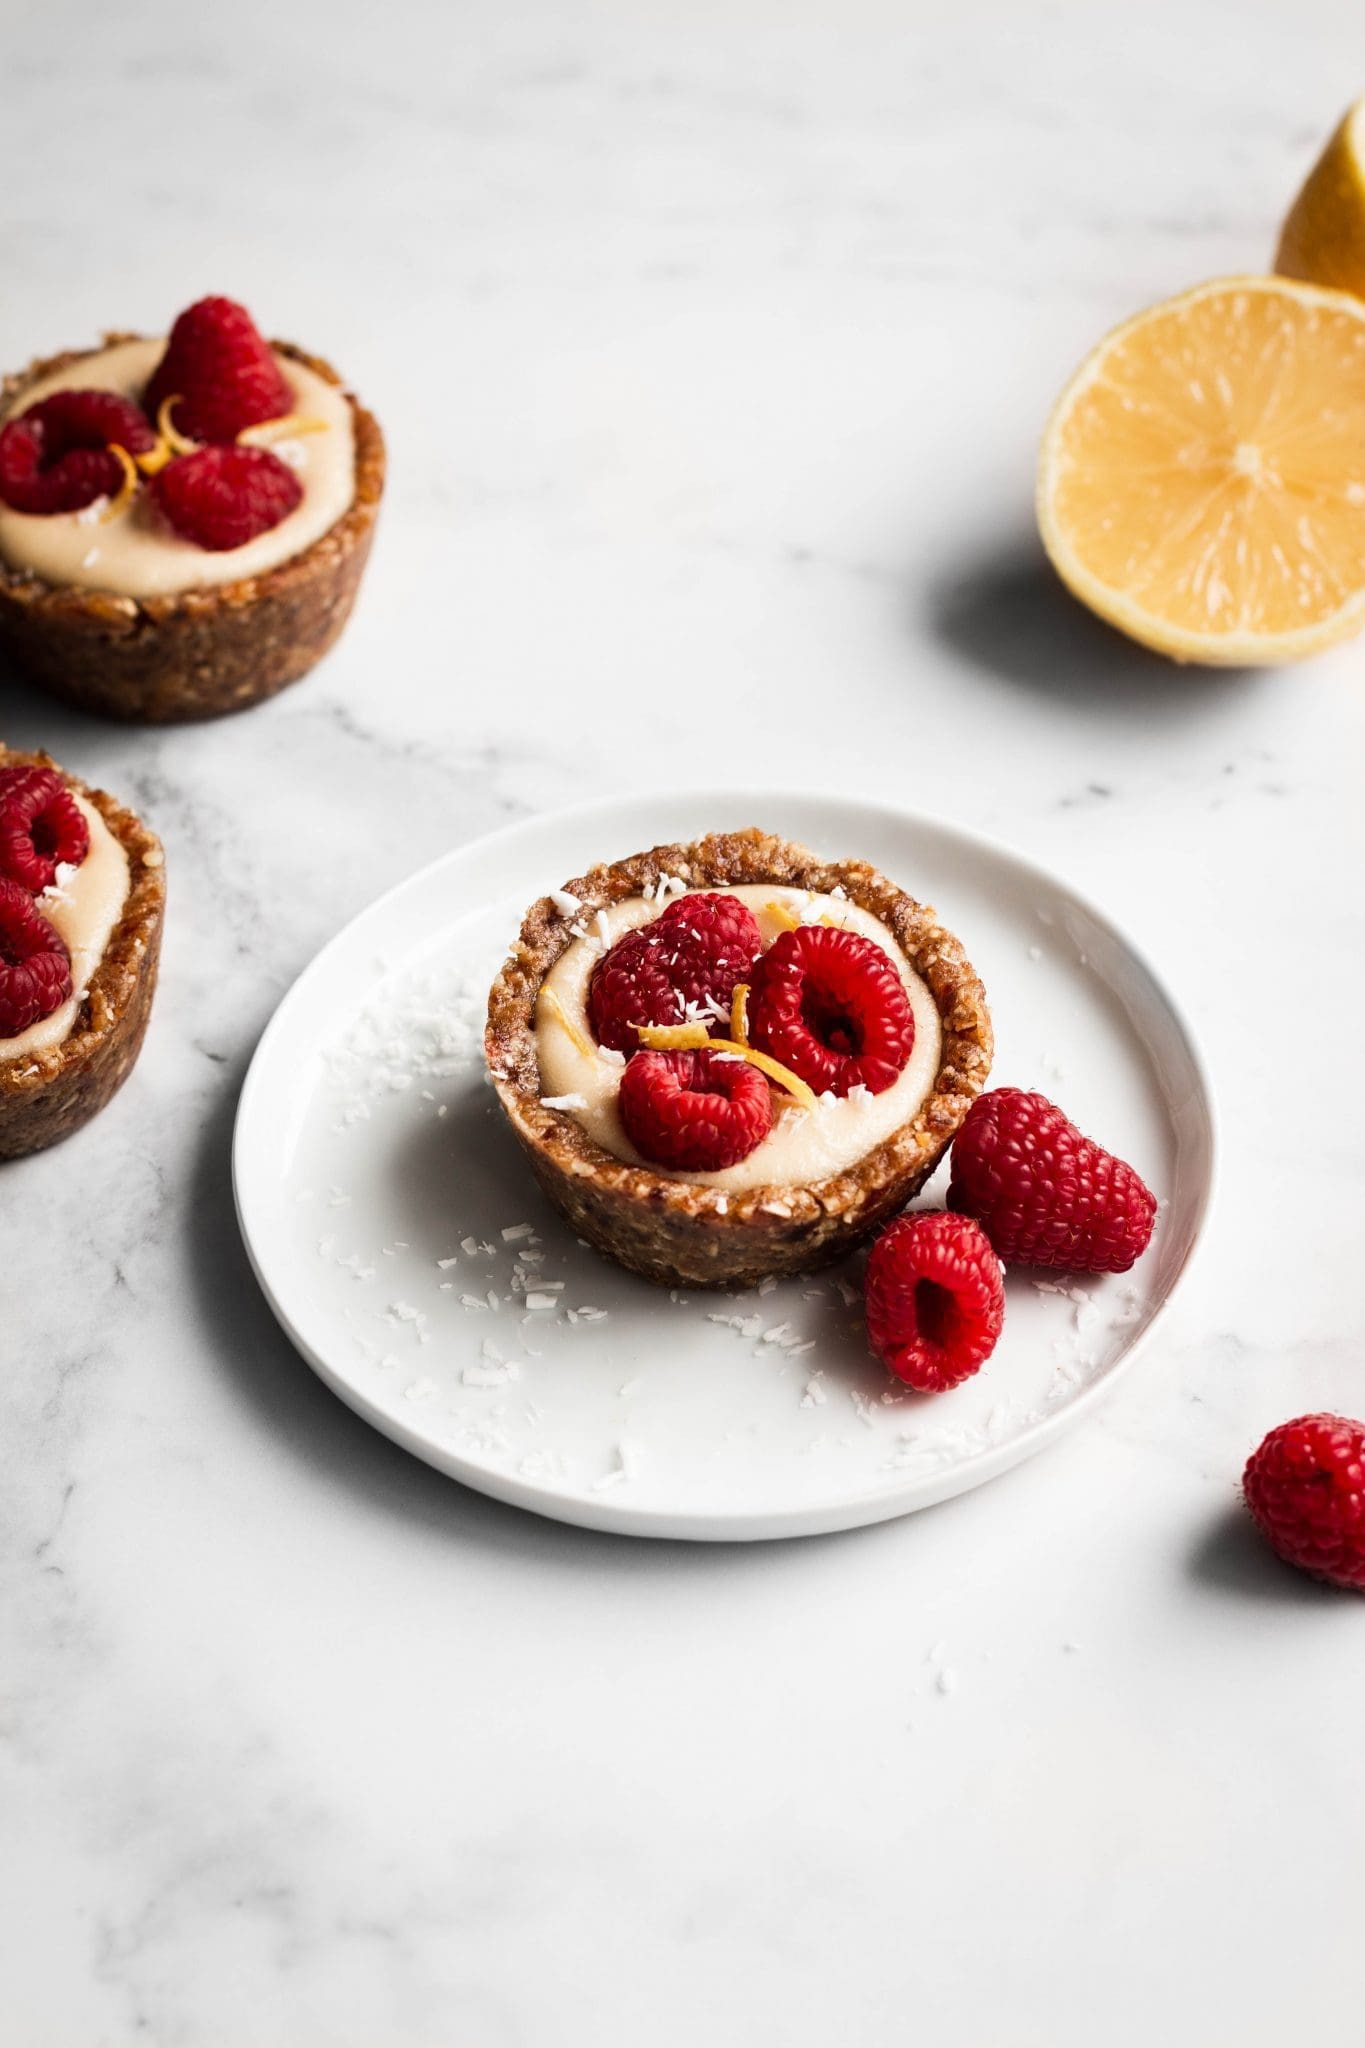
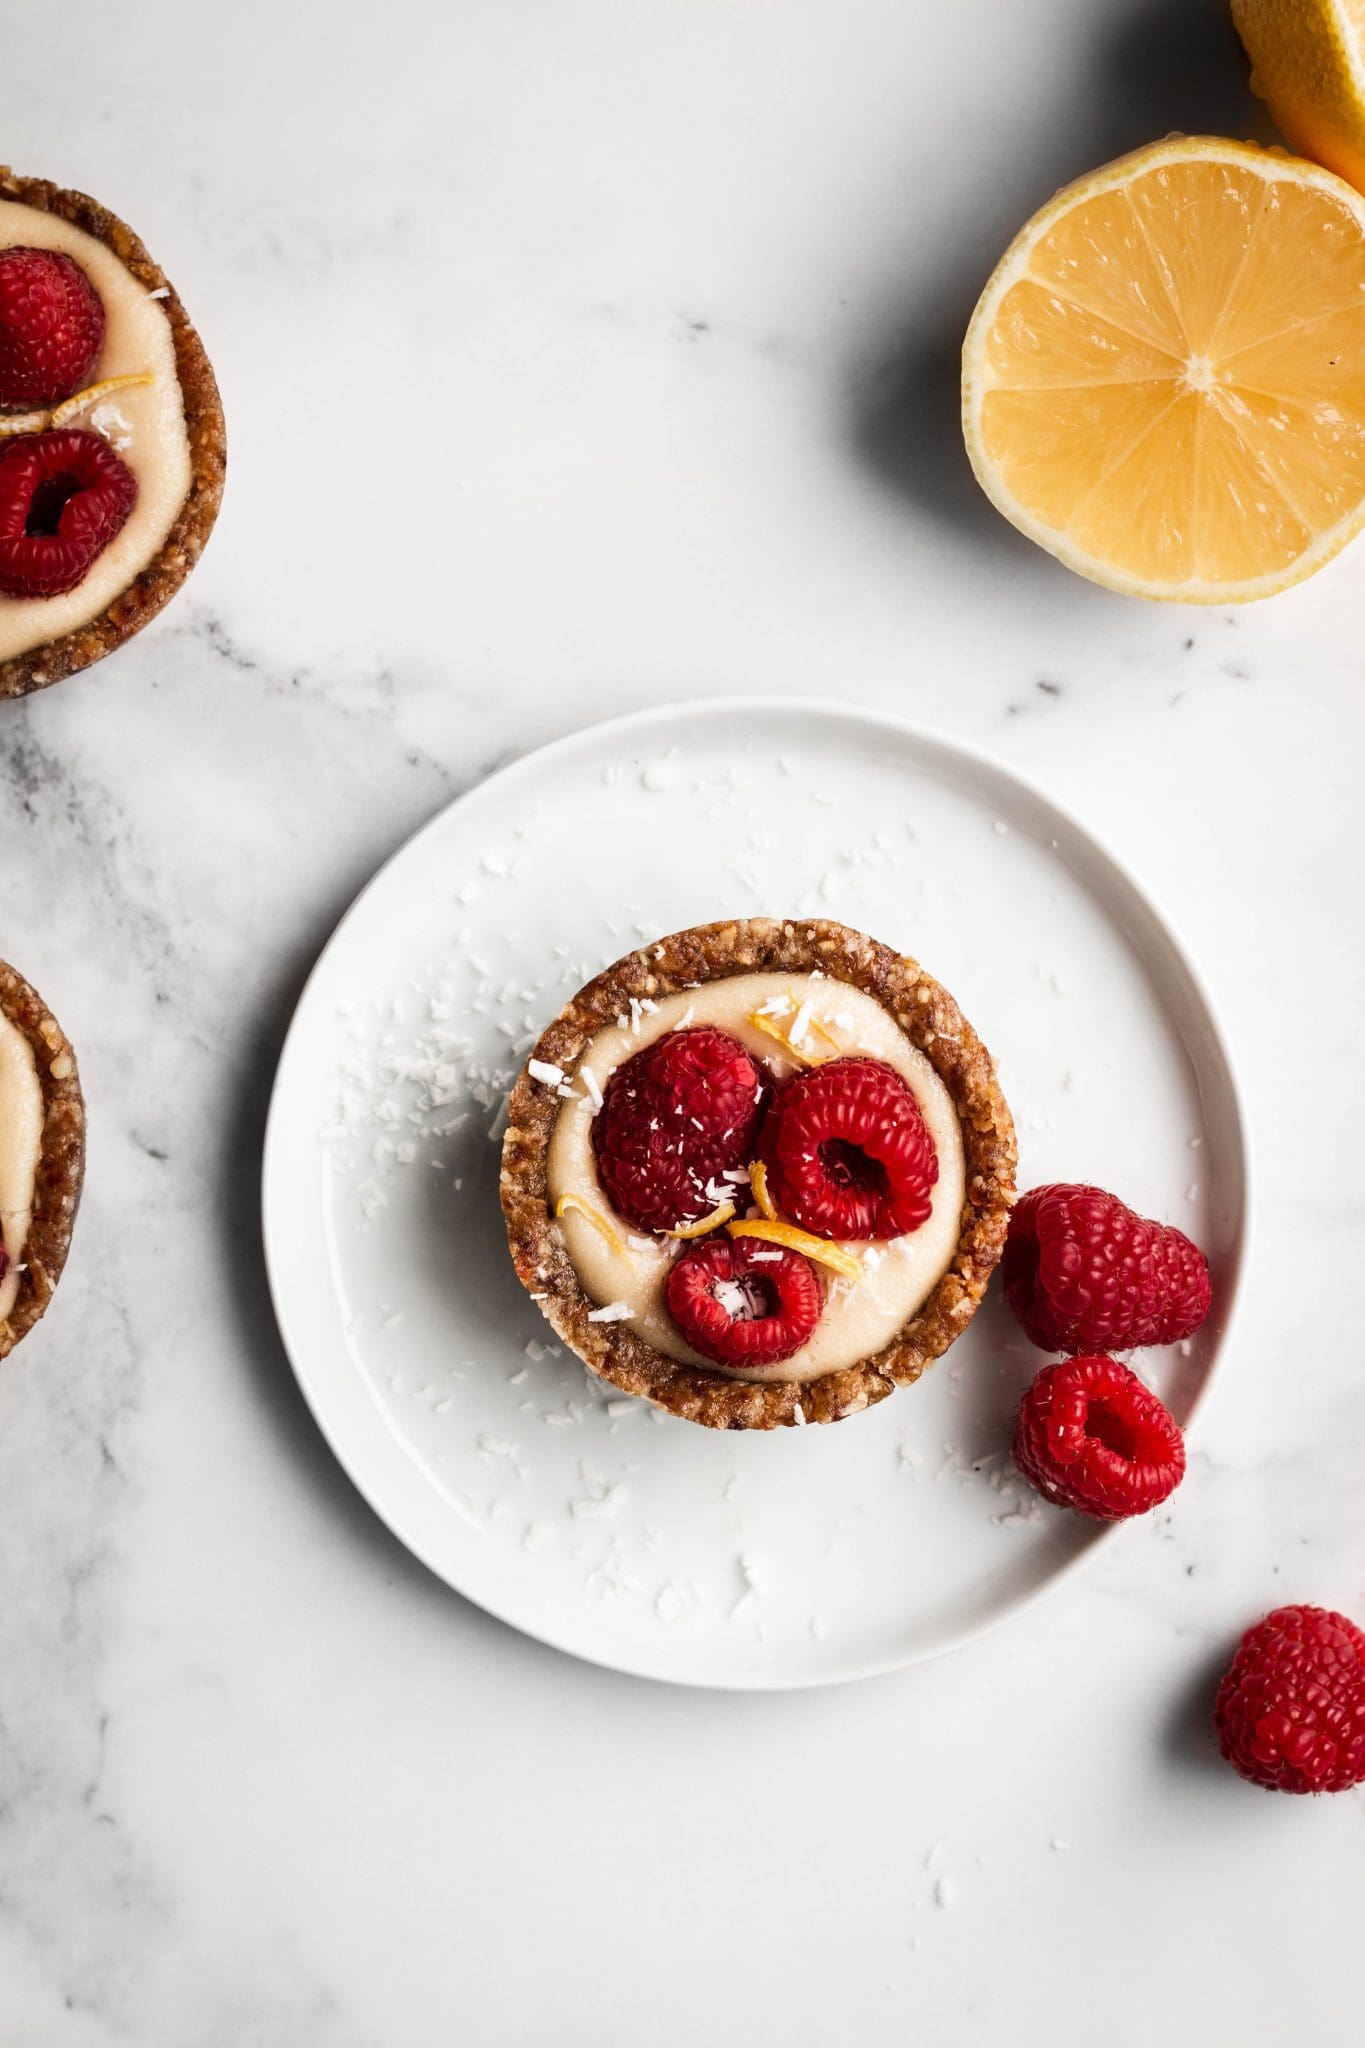
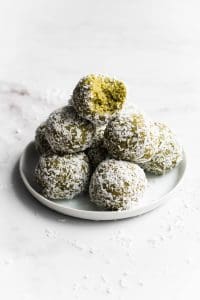
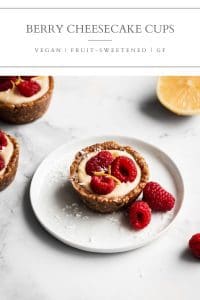
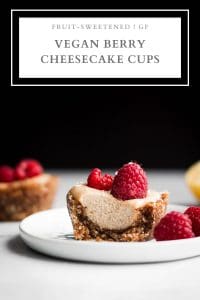
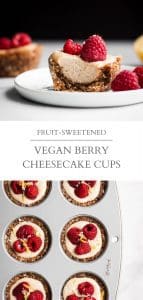
Vegan berry cheesecake cups. These nutritious no-bake cheesecake cups are vegan, gluten-free and fruit-sweetened. Top them with your favorite berries or fruit jam!

vegan berry cheesecake cups

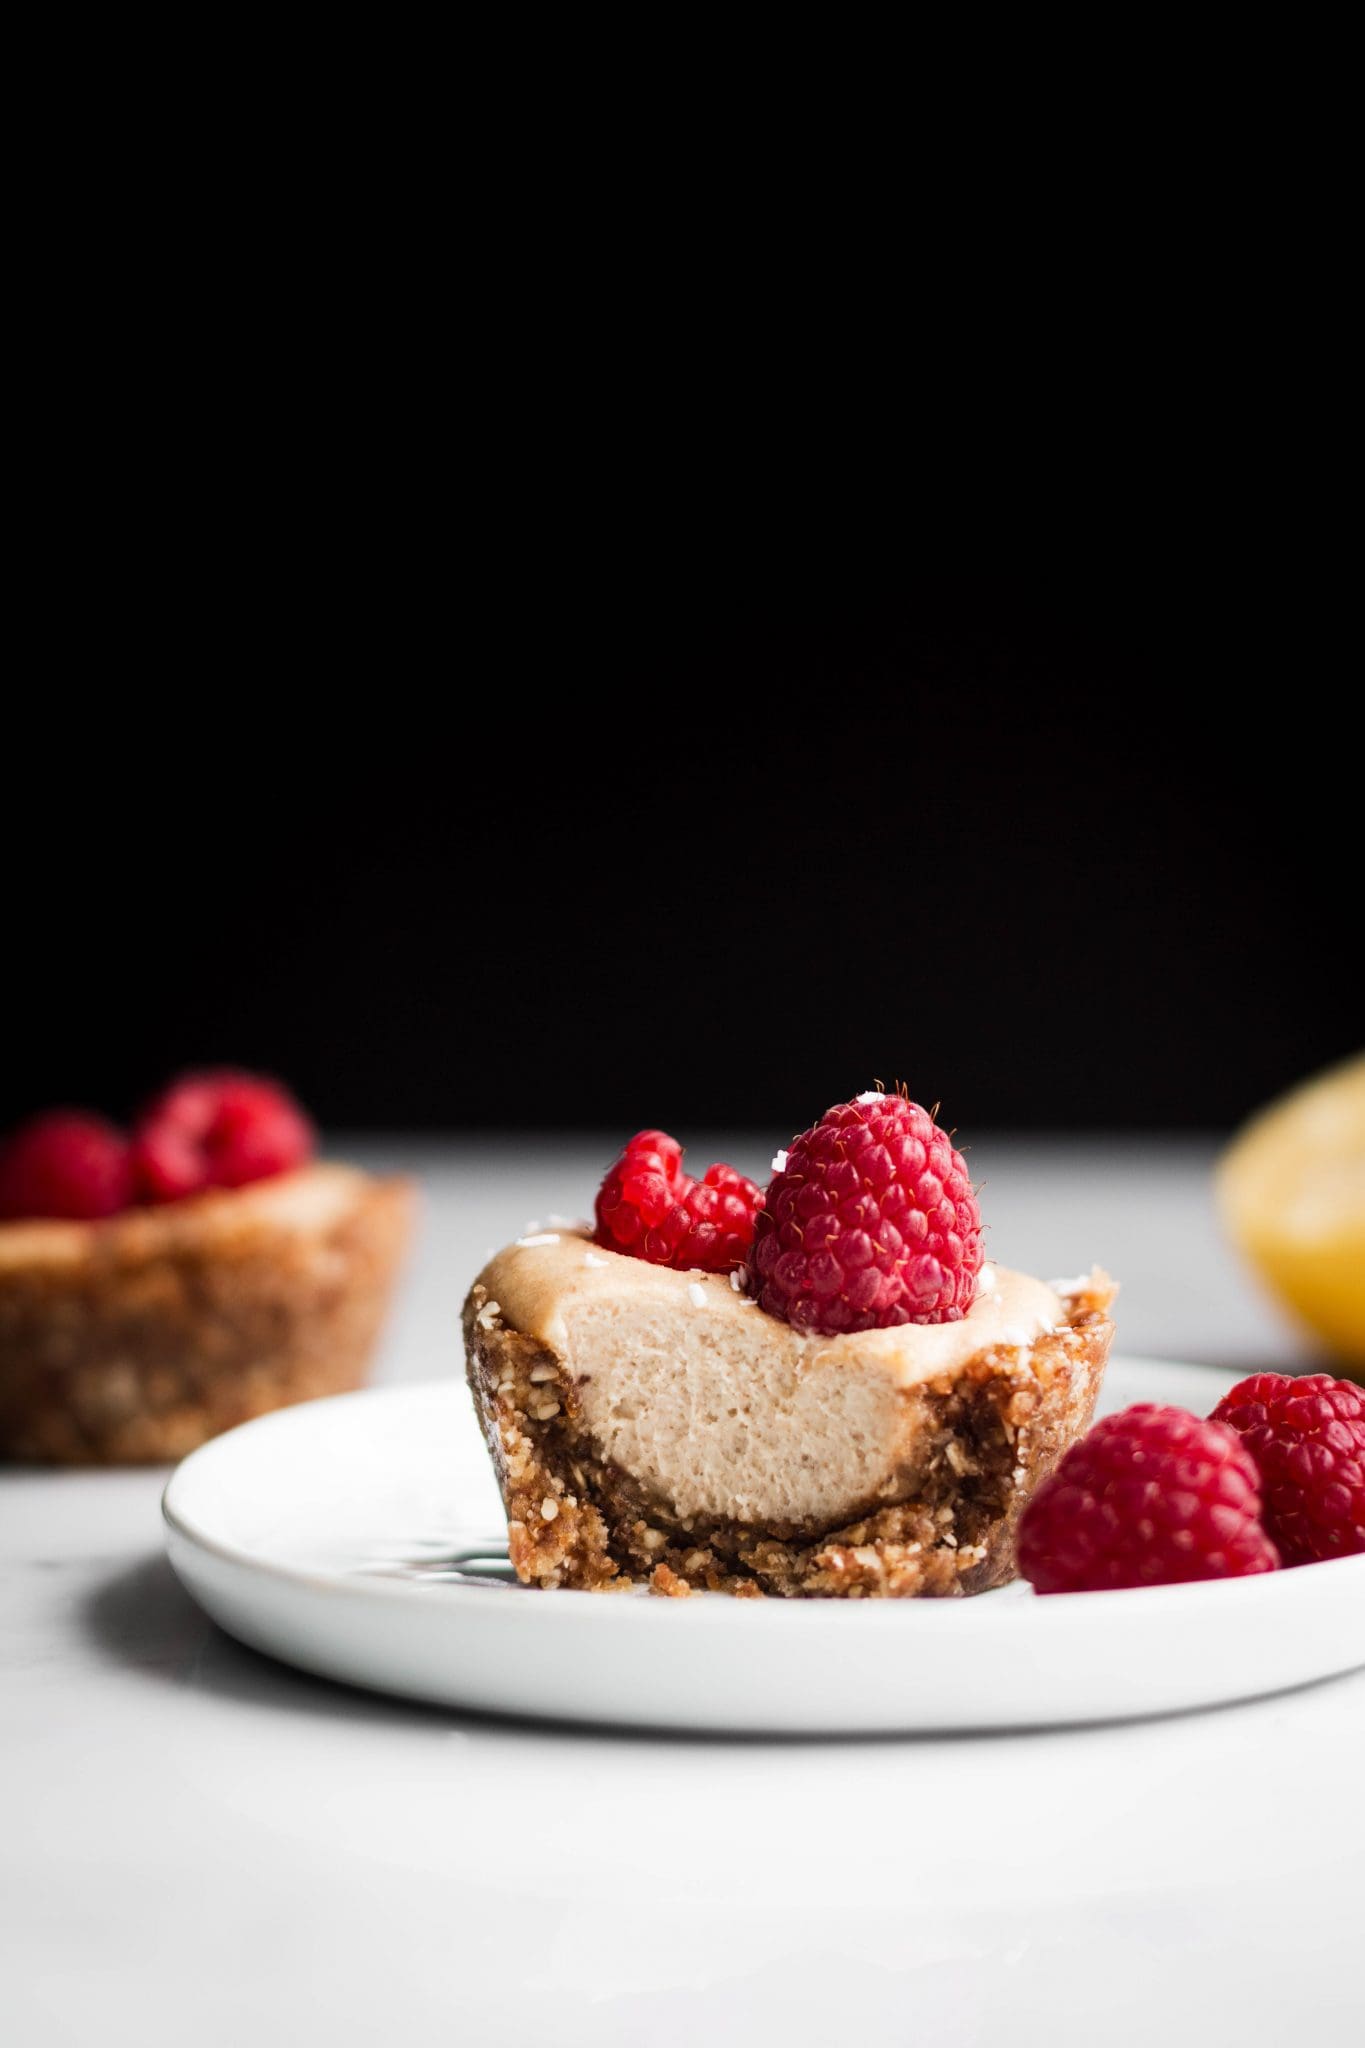
Vegan, gluten-free and fruit-sweetened cheesecake cups. This recipe might be very different from a regular cheesecake, but it’s a delicious dessert for those looking for an allergy-friendly and/or vegan option.

This recipe has been updated and improved since it was first posted in 2019. This version has a slightly lighter filling with added lemon juice for a bright flavor. I hope you’ll like it as much as I do!

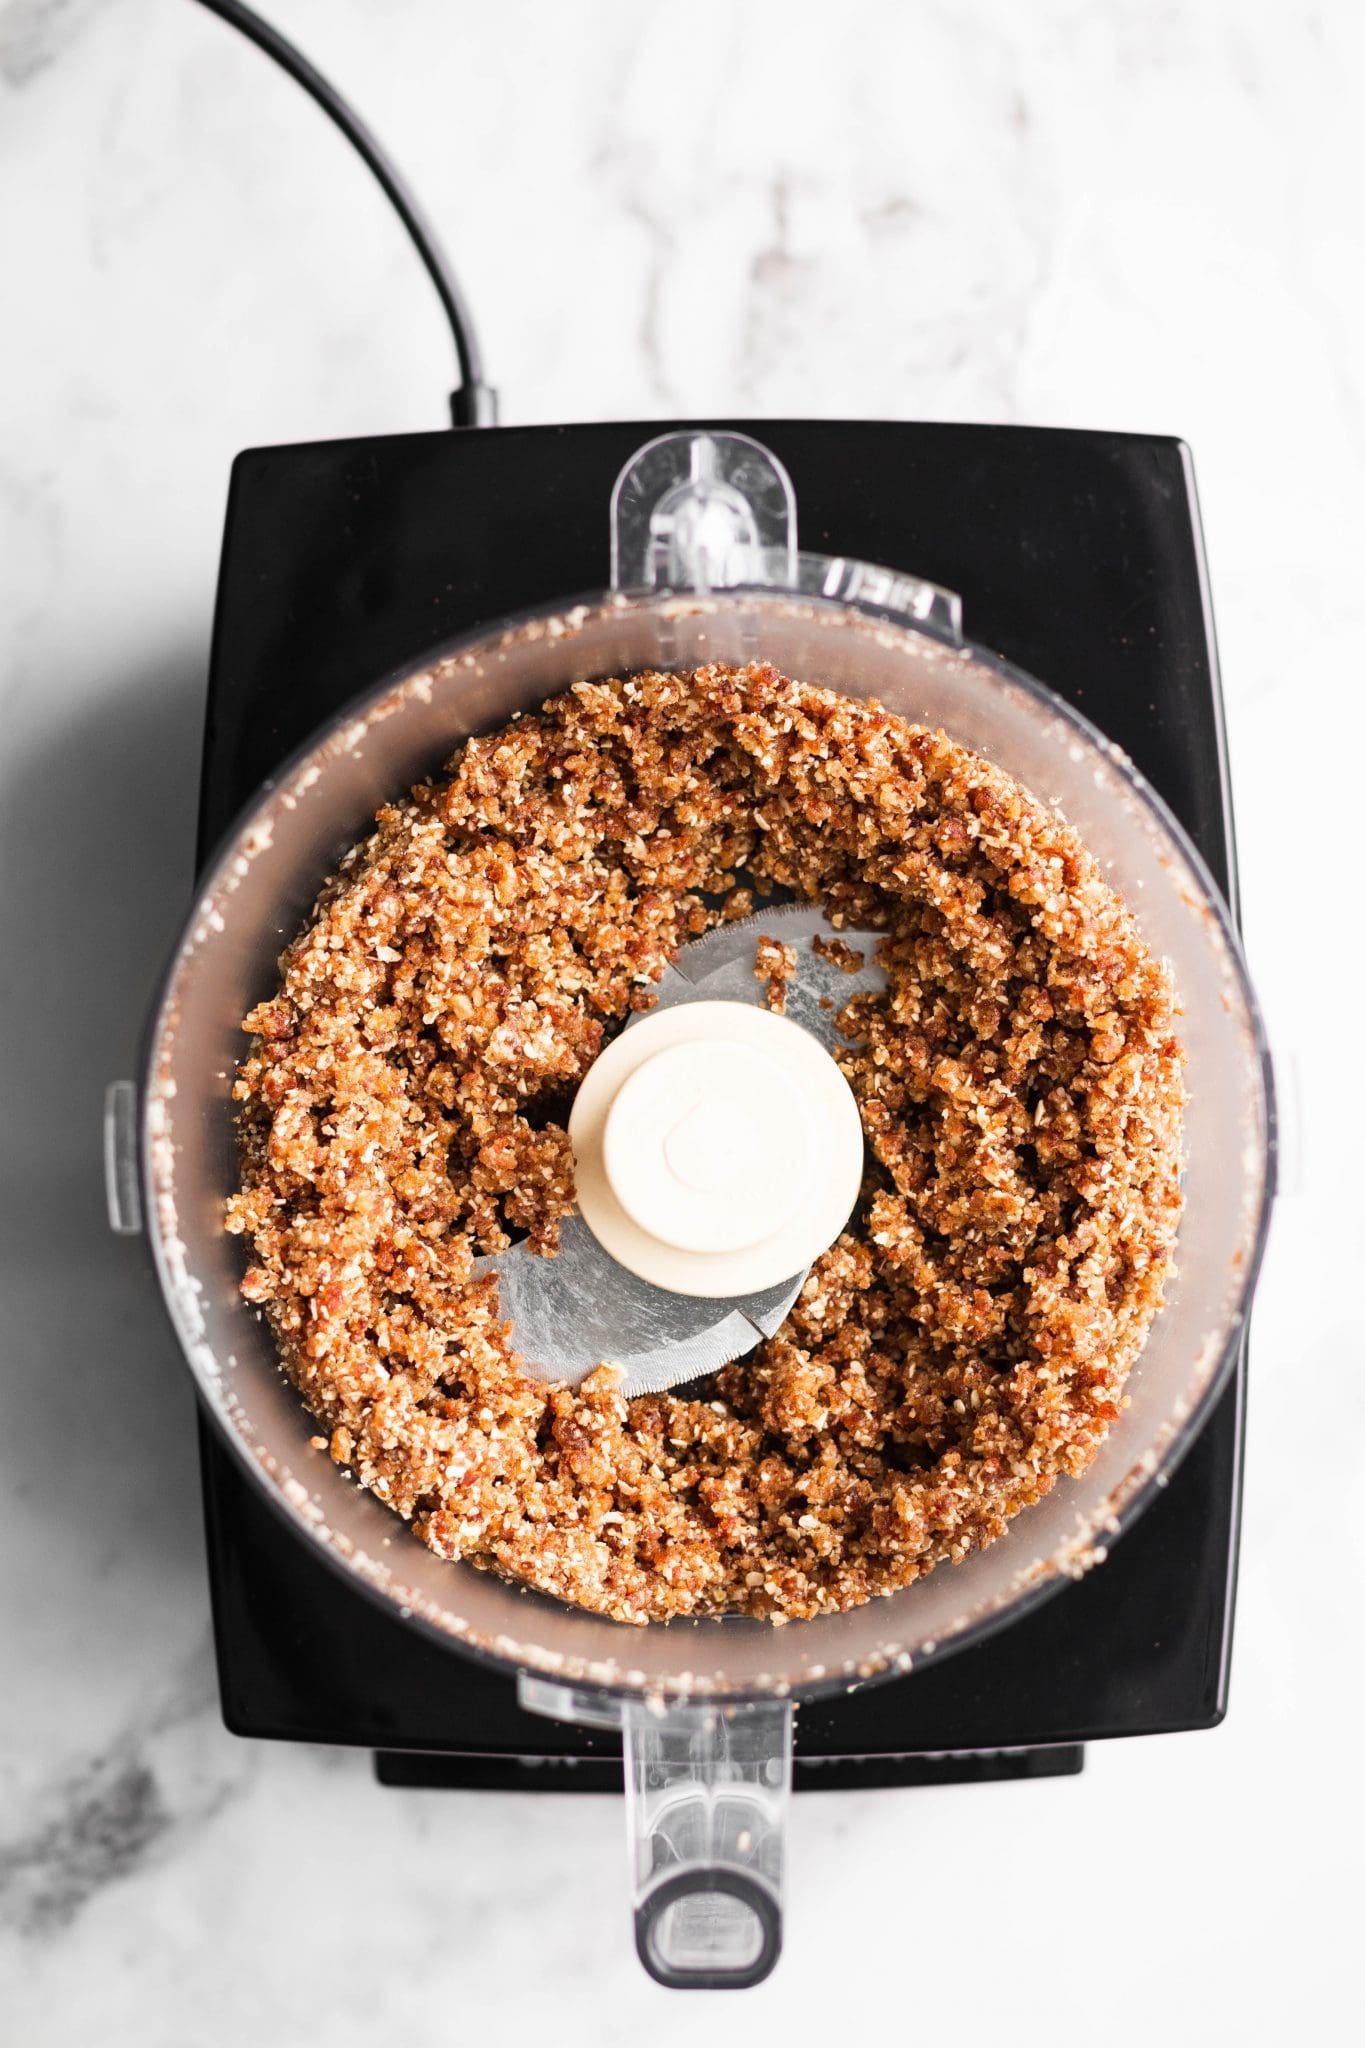
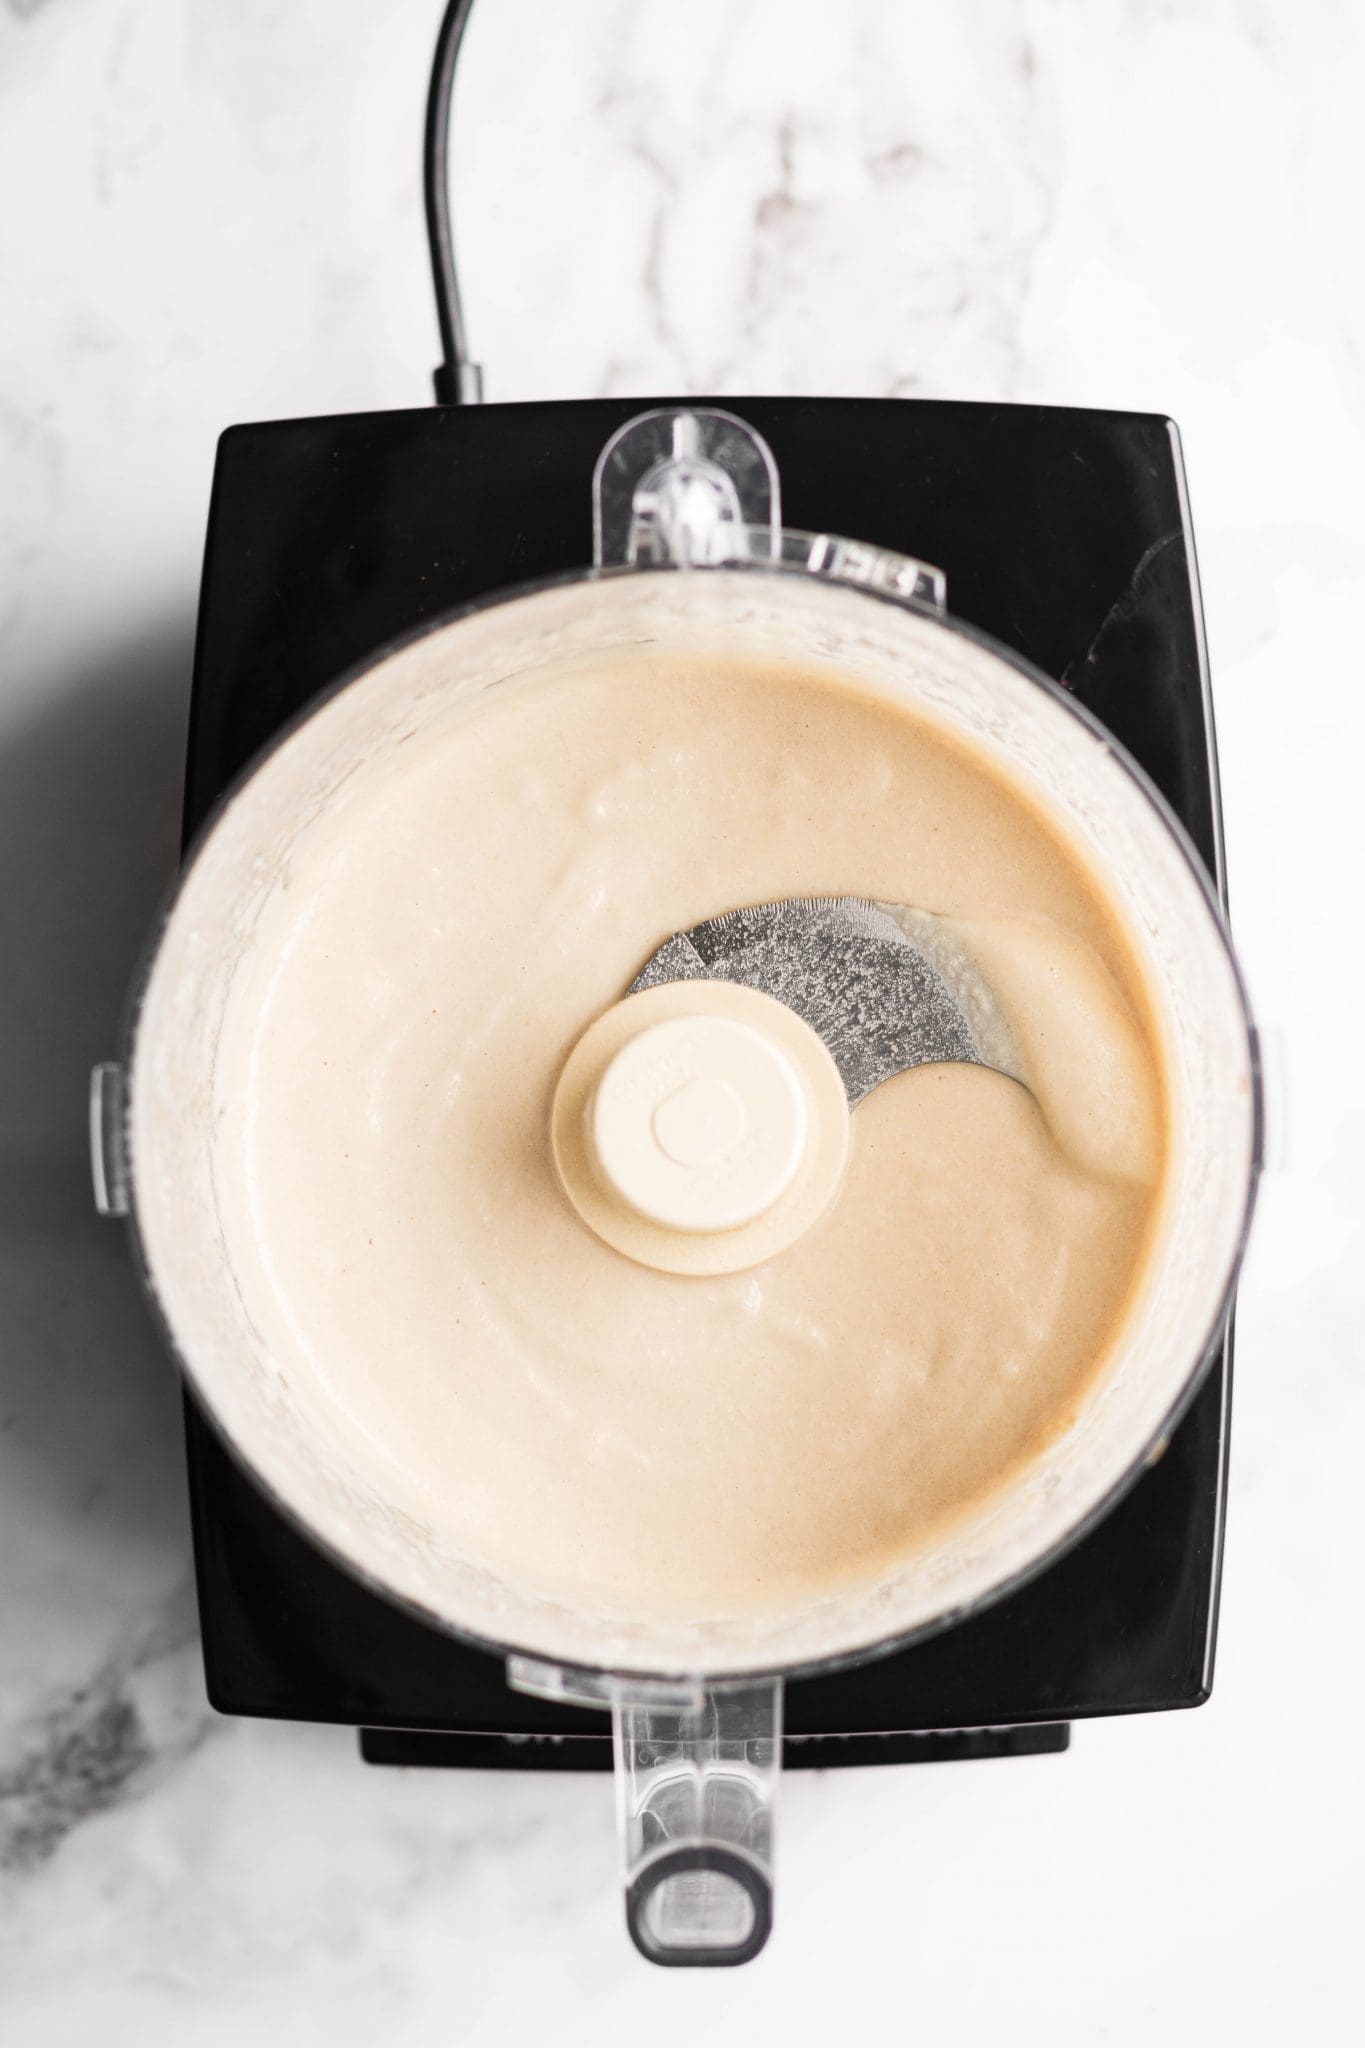
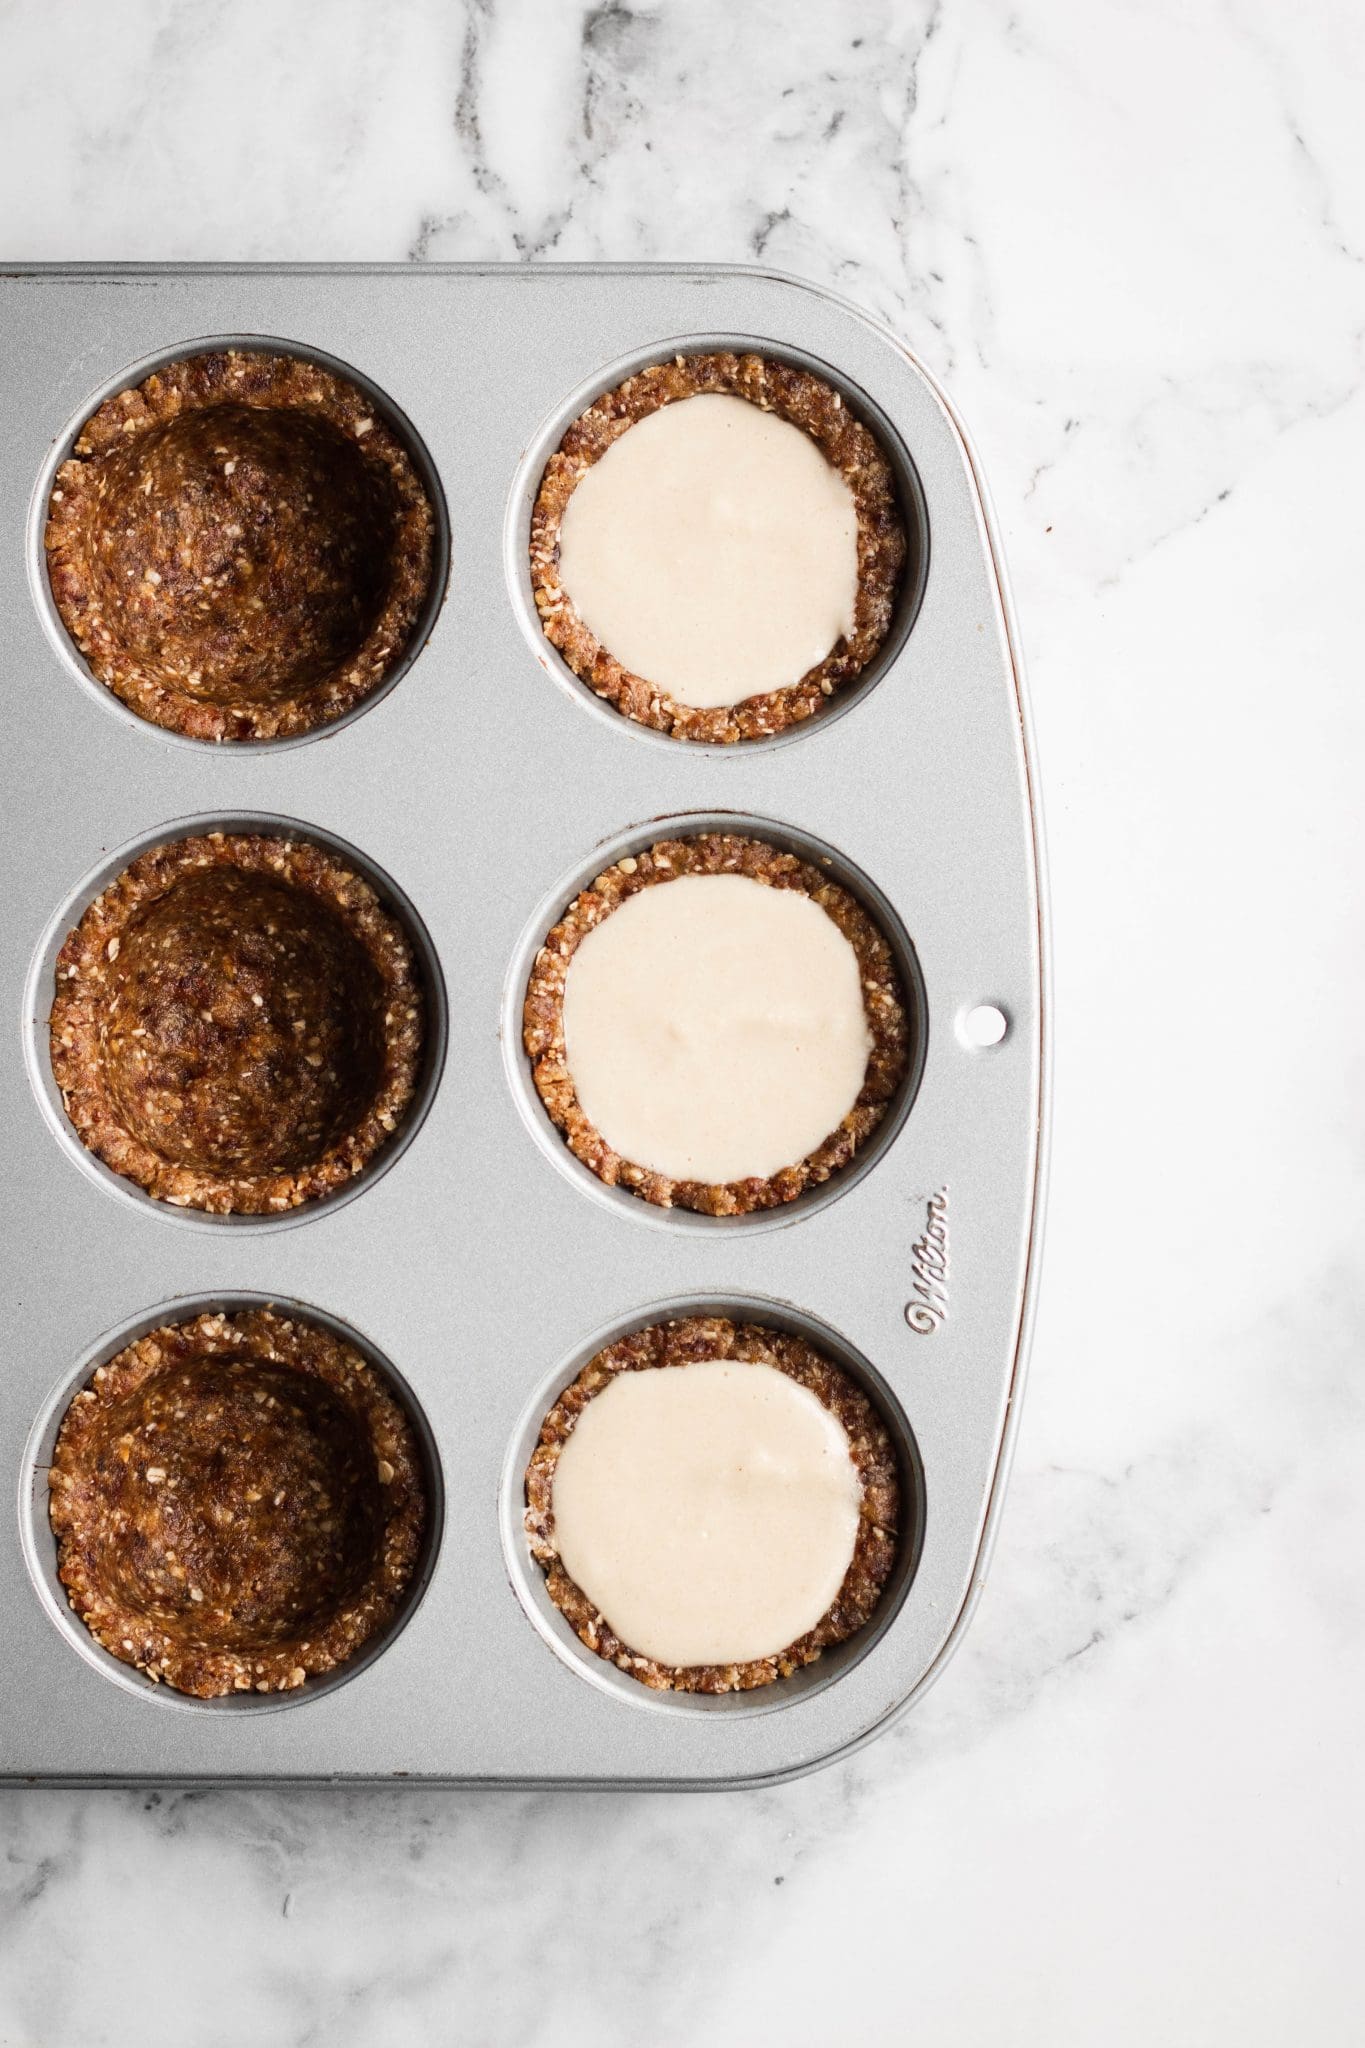
What you need: Dates, walnuts, oats, cashews, coconut milk, coconut oil, lemon juice, vanilla and salt.

How to Make Vegan Cheesecake Cups:

Start by making the crust: Process dates, walnuts, oats, vanilla and salt in a food processor. Press the mixture at the bottom of muffin tins to make little cups.

Next, make the filling: Process soaked cashews, dates, coconut milk, coconut oil, lemon juice, vanilla and salt. The filling should be smooth and creamy.

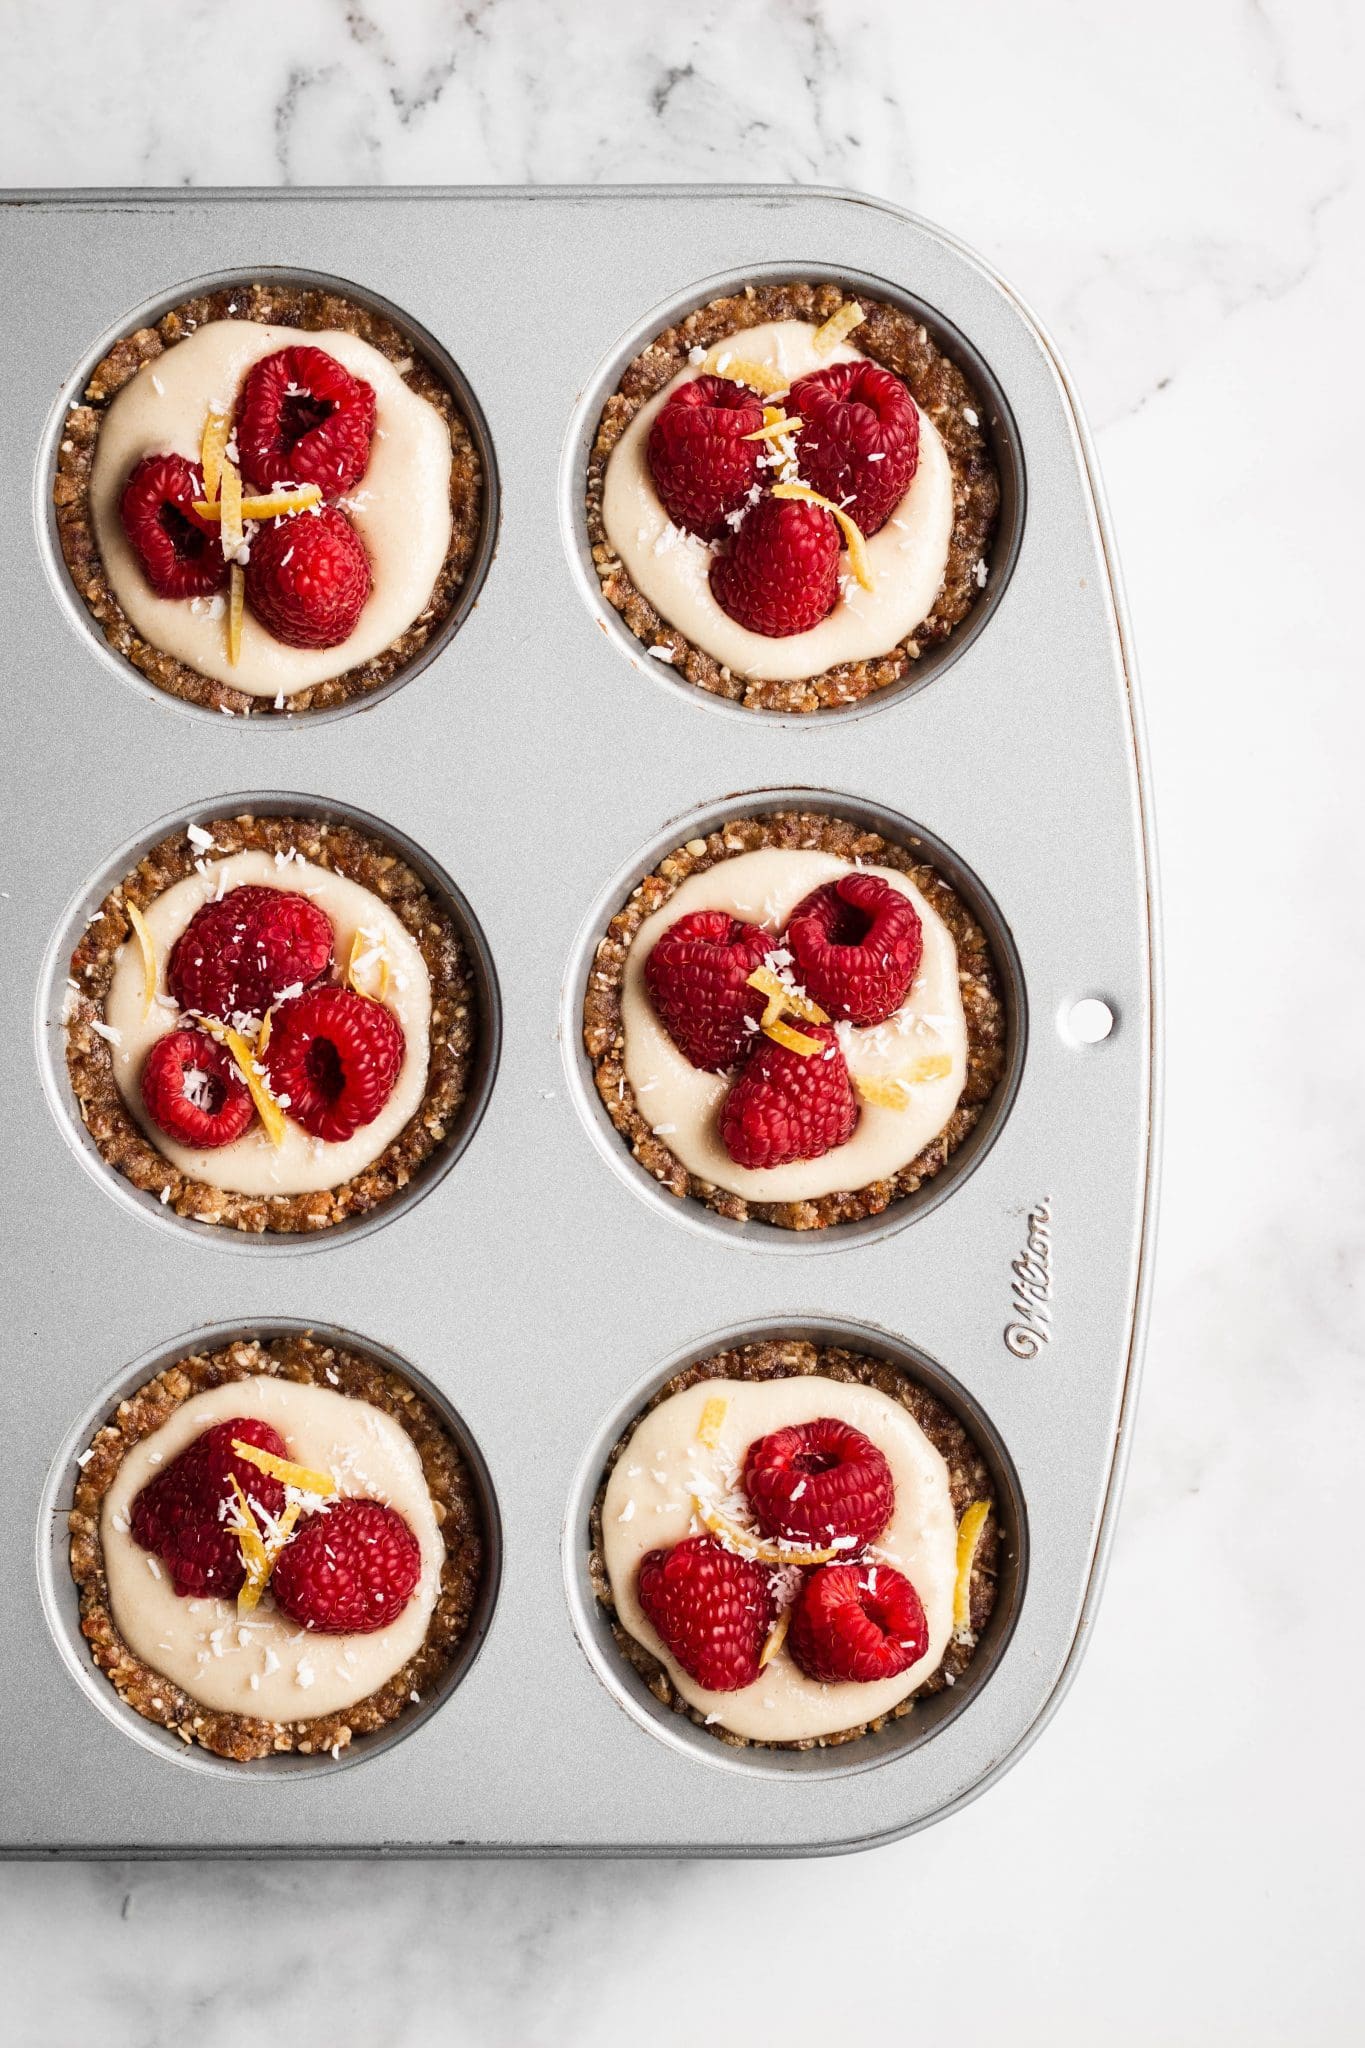
Finally, assemble the cheesecake cups: Scoop the filling into each cup and top them with your favorite berries or jam. Done!

cheesecake crust in a food processor
cheesecake filling in a food processor
cheesecake cups in a muffin tin without toppings
cheesecake cups in muffin tins with raspberries

Ingredient Substitutions:

  • You can use either dates or maple syrup in the filling. Both work well, though the date version is my favorite. I would recommend using maple syrup if your food processor is weak to avoid pieces of dates in the filling.
  • Use your favorite berries for topping. I tried this recipe with both strawberries and raspberries and both were delicious. You can also use your favorite jam or frozen berries that have been thawed and mashed.
  • You can use other nuts instead of walnuts in the crust. Cashews would be the best substitute.
  • I don’t recommend using light coconut milk in the filling. The high-fat coconut milk helps keep the filling firm and creamy.
  • For a lighter coconut flavor, use refined coconut oil. You will still get a very light coconut flavor from the milk, but it won’t be overpowering. If you don’t enjoy coconut, this might not be the recipe for you.

How to Store Cheesecake Cups:

Store these cheesecake cups in the refrigerator, covered, for the best texture. This will keep the filling perfectly soft and creamy. You can store the cups in the freezer for longer, but the texture of the filling will be affected.

More No-Bake Vegan Desserts:

vegan berry cheesecake cup from the top
vegan berry cheesecake cup from the side with bite taken

Watch How to Make the Recipe:

vegan berry cheesecake cups
Print Pin
4.41 from 5 votes

Vegan Berry Cheesecake Cups (Fruit-Sweetened)

These nutritious no-bake cheesecake cups are vegan, gluten-free and fruit-sweetened. Top them with your favorite berries or fruit jam!
Course Dessert
Cuisine vegan
Prep Time 20 minutes
Chill Time 1 hour
Total Time 1 hour 20 minutes
Servings 9

Ingredients

  • Fresh berries, for topping (see notes)

For the Crust

  • 1 cup Medjool dates, pitted
  • 1 cup walnuts
  • 1/2 cup rolled oats
  • 1/2 teaspoon vanilla extract
  • 1/4 teaspoon salt

For the Cheesecake Filling

  • 1 cup cashews, raw or dry roasted, unsalted
  • 1/4 cup Medjool dates, pitted (or 1/4 cup maple syrup)
  • 1/2 cup canned full-fat coconut milk
  • 1/4 cup coconut oil, melted
  • 1-2 tablespoons lemon juice
  • 1/2 teaspoon vanilla extract
  • 1/4 teaspoon salt

Instructions

  • Soak the cashews in hot water for 30 minutes. I use water boiled from a kettle. Meanwhile, prepare the crust.

Prepare the Crust

  • Add the dates, walnuts, oats, vanilla and salt to a food processor. Process until the mixture sticks together when pressed.
  • Press the mixture to the bottom of a muffin pan forming little cups (makes 9 in a regular sized muffin pan). The crust will go about halfway to three quarters up the top of the muffin tins. Make sure the crust is not too thin. Place in the fridge while you prepare the filling.

Prepare the Filling

  • In the same food processor (rinsed to remove any crumbs), add the soaked cashews, dates or maple, coconut milk, coconut oil, lemon juice, vanilla and salt. Process until smooth, up to 3-5 minutes. Scrape the sides as needed.

Assemble the Cheesecake Cups

  • Scoop the filling into each little cup. Top each cup with fresh berries or jam of choice.
  • Refrigerate until it sets, about 4 hours. Store them covered in the fridge for up to 4 days. Enjoy them straight from the fridge. You could also store them in the freezer, but it will affect the texture of the filling.

Notes

This recipe makes 9 regular cups or 6 larger cups.
To remove the cups from the muffin pan, use a butter knife around the cups to loosen them. 
You can use either dates or maple syrup in the filling. Both work well. I would recommend using maple syrup if your food processor is weak to avoid pieces of dates in the filling.
Use your favorite berries for topping. I tried this recipe with both strawberries and raspberries and both were delicious. You can also use your favorite jam or frozen berries that have been thawed and mashed.
You can also make this recipe using a square glass dish and made them into bars. A smaller dish would be best to have thicker bars.
If the crust mixture is dry and doesn’t stick when pressed, you can add a small amount of water or melted coconut oil. Start with a very small amount to avoid getting a “soggy” crust. You shouldn’t need this if you use soft dates.
This recipe has been updated and improved since first being posted in 2019. This version has a slightly lighter filling with added lemon juice. The crust has also been lightly updated to avoid using water, which could make it overly moist.

If you make these vegan berry cheesecake cups, be sure to leave a comment and/or give this recipe a rating! I love to hear from you guys. And of course, if you try this recipe, don’t forget to tag me on Instagram!


more recipes

Simple Barley and Vegetable Soup
Quick Weeknight Tortilla Pizza
Creamy Mushroom and Dumpling Soup
45 Balanced Vegan Meal Prep Recipes

search recipes

Comments

14 responses to “Vegan Berry Cheesecake Cups (Fruit-Sweetened)”

  1. Juliana Avatar
    Juliana

    Hi Caroline,
    love your work.

    Can I please ask for the recipe for the vegan berry cheesake cups, i cannot seem to find it anywhere

    Thank you
    Juliana

    1. Nourished by Caroline Avatar

      Hi Juliana, thank you so much! And so sorry about that. We recently updated the blog and it seems that a few recipes got missed. It’s been updated. You should find it on the post now.

      Thank you for letting me know. I hope you’ll like it!

  2. Alice Spencer Avatar
    Alice Spencer

    5 stars
    These desserts are wonderful! I love the natural sweetness flavouring and the creamy texture in contrast with the yummy flapjack style base. I have lost count of how many times I have made these desserts but I will continue to make them again and again! I love that they are filling too without feeling heavy. 10/10!

    1. Nourished by Caroline Avatar

      Thank you so much for the kind words Alice! I’m so happy you love it. 🙂

  3. Leah Carver Avatar
    Leah Carver

    Hello, I’d like to make these for my mom for Mother’s Day as she just got diagnosed with cancer and has to switch to a vegan diet. It all sounds perfect for her except the coconut oil, she’s not supposed to have any oils. Do you know what I can replace that with?

    1. Nourished by Caroline Avatar

      Hi Leah, so sorry for the late response. If you’re interested in making it in the future, I would recommend simply skipping the coconut oil. You can add an additional 3 tablespoons of coconut milk if needed for blending. The coconut oil does help the “cheesecake” filling firm up, but as long as you use full-fat coconut milk and let the recipe chill in the fridge or freezer, it should work, though I can’t guarantee without trying first. I hope this helps!

  4. Natalie Avatar
    Natalie

    2 stars
    My batch turned out looking exactly as pictured! Structurally easy, and yes the filling hardens nicely in the fridge.

    I don’t like the moist crust (I used only 1 tsp of water, and even popped the crusts in the oven for 5 minutes after shaping in the cupcake tray to try to dry them a bit more, but they are still moist). I’d prefer a dry crust.

    I really dislike the heaviness of the filling (and the coconut taste). This is certainly not a light dessert.

    The tastes I have after eating are dates, mushy cashews, and coconut oil… at least the berry on top cuts through some of the heaviness/flavour.

    This was an interesting concept and I’m glad I tried it, but I personally won’t be making this again or serving this. I wonder if there is a way to alter the taste / heaviness?

    I see other viewers had very positive comments. Perhaps our taste palates are different?

    1. Nourished by Caroline Avatar

      Hi Natalie, thank you for the feedback! I’m sorry that you didn’t enjoy the recipe – I can understand that it’s not for everyone. It’s definitely not a traditional cheesecake recipe as it is vegan, gluten-free and fruit-sweetened. Plus, it is quite filling and not so light due to the hearty ingredients like cashews. To reduce the coconut taste, you could always use refined coconut oil, though you will still get some of the coconut flavor from the coconut milk. Using roasted cashews also adds a different flavor than raw cashews.

  5. Shaun Avatar
    Shaun

    5 stars
    A great, quick snack!

    1. Nourished by Caroline Avatar

      Thank you! I’m happy you like the recipe. 🙂

  6. Danielle Wrubel Avatar
    Danielle Wrubel

    5 stars
    So delicious!!! I even just used my vitamix since I didn’t have a food processor and it worked perfectly!!

    1. Nourished by Caroline Avatar

      Thank you Danielle, I’m happy you loved it! it’s great to hear that it worked well with the Vitamix too!

  7. Tris Avatar
    Tris

    5 stars
    Super delicious! Wow. I loved how creamy the filling turned out + it hardened nicely after being in the fridge. It was really hard to not just eat them all in one day hahaha.

    1. Nourished by Caroline Avatar

      Thank you so much, I’m happy you loved the recipe! 🙂

Leave a Reply

Your email address will not be published. Required fields are marked *

Recipe Rating


This site uses Akismet to reduce spam. Learn how your comment data is processed.