Your cart is currently empty!

prep time
cook time
servings
8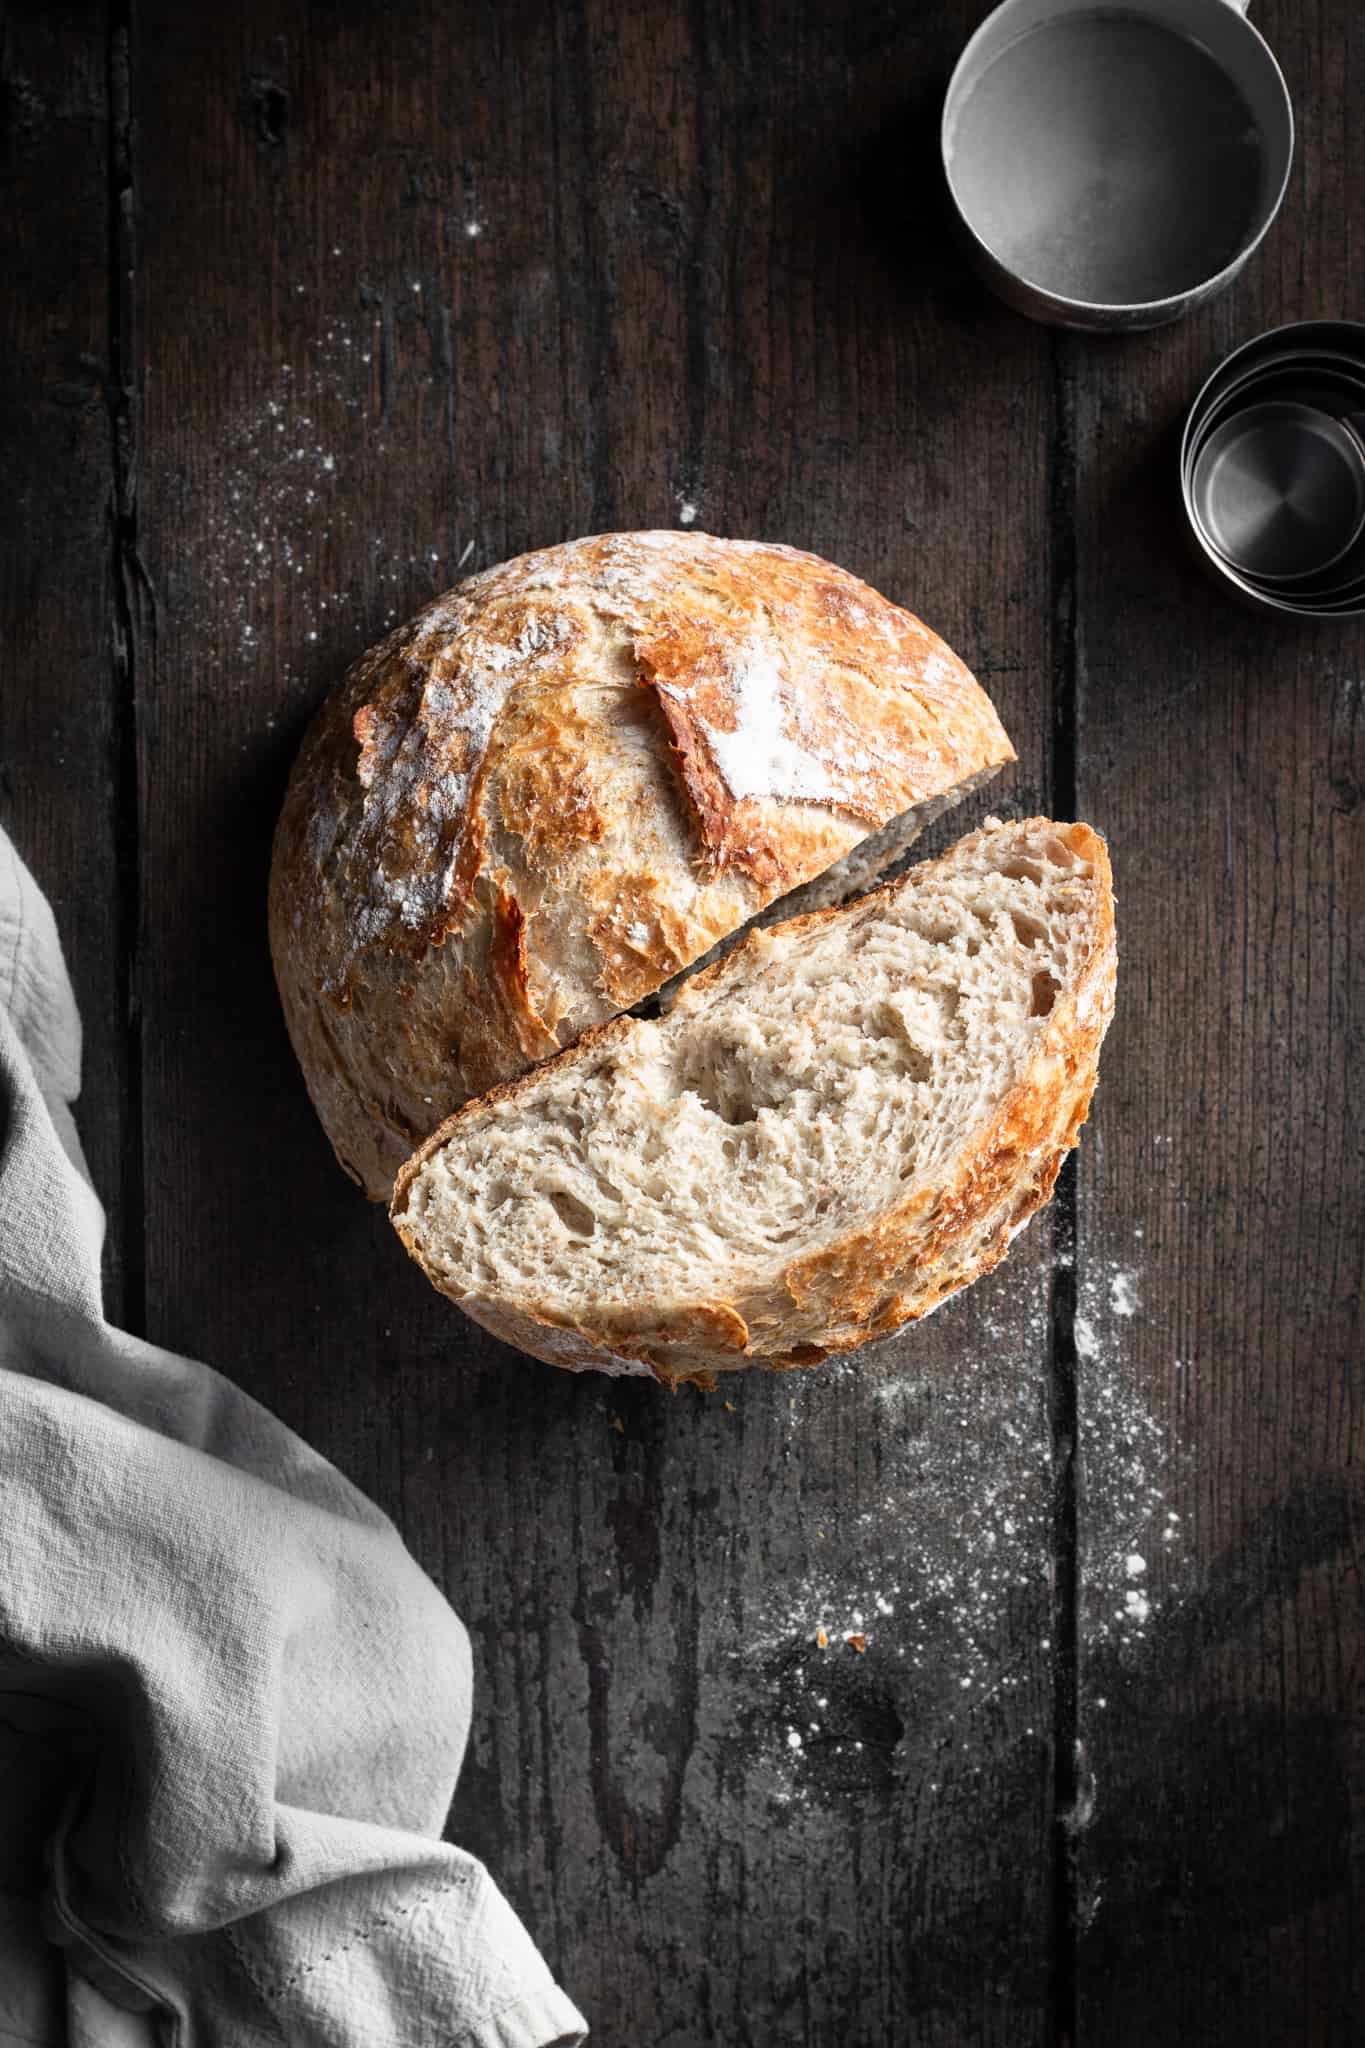
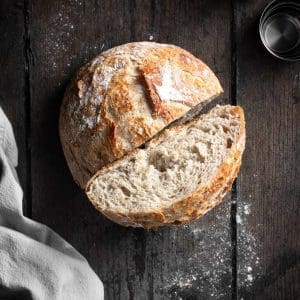
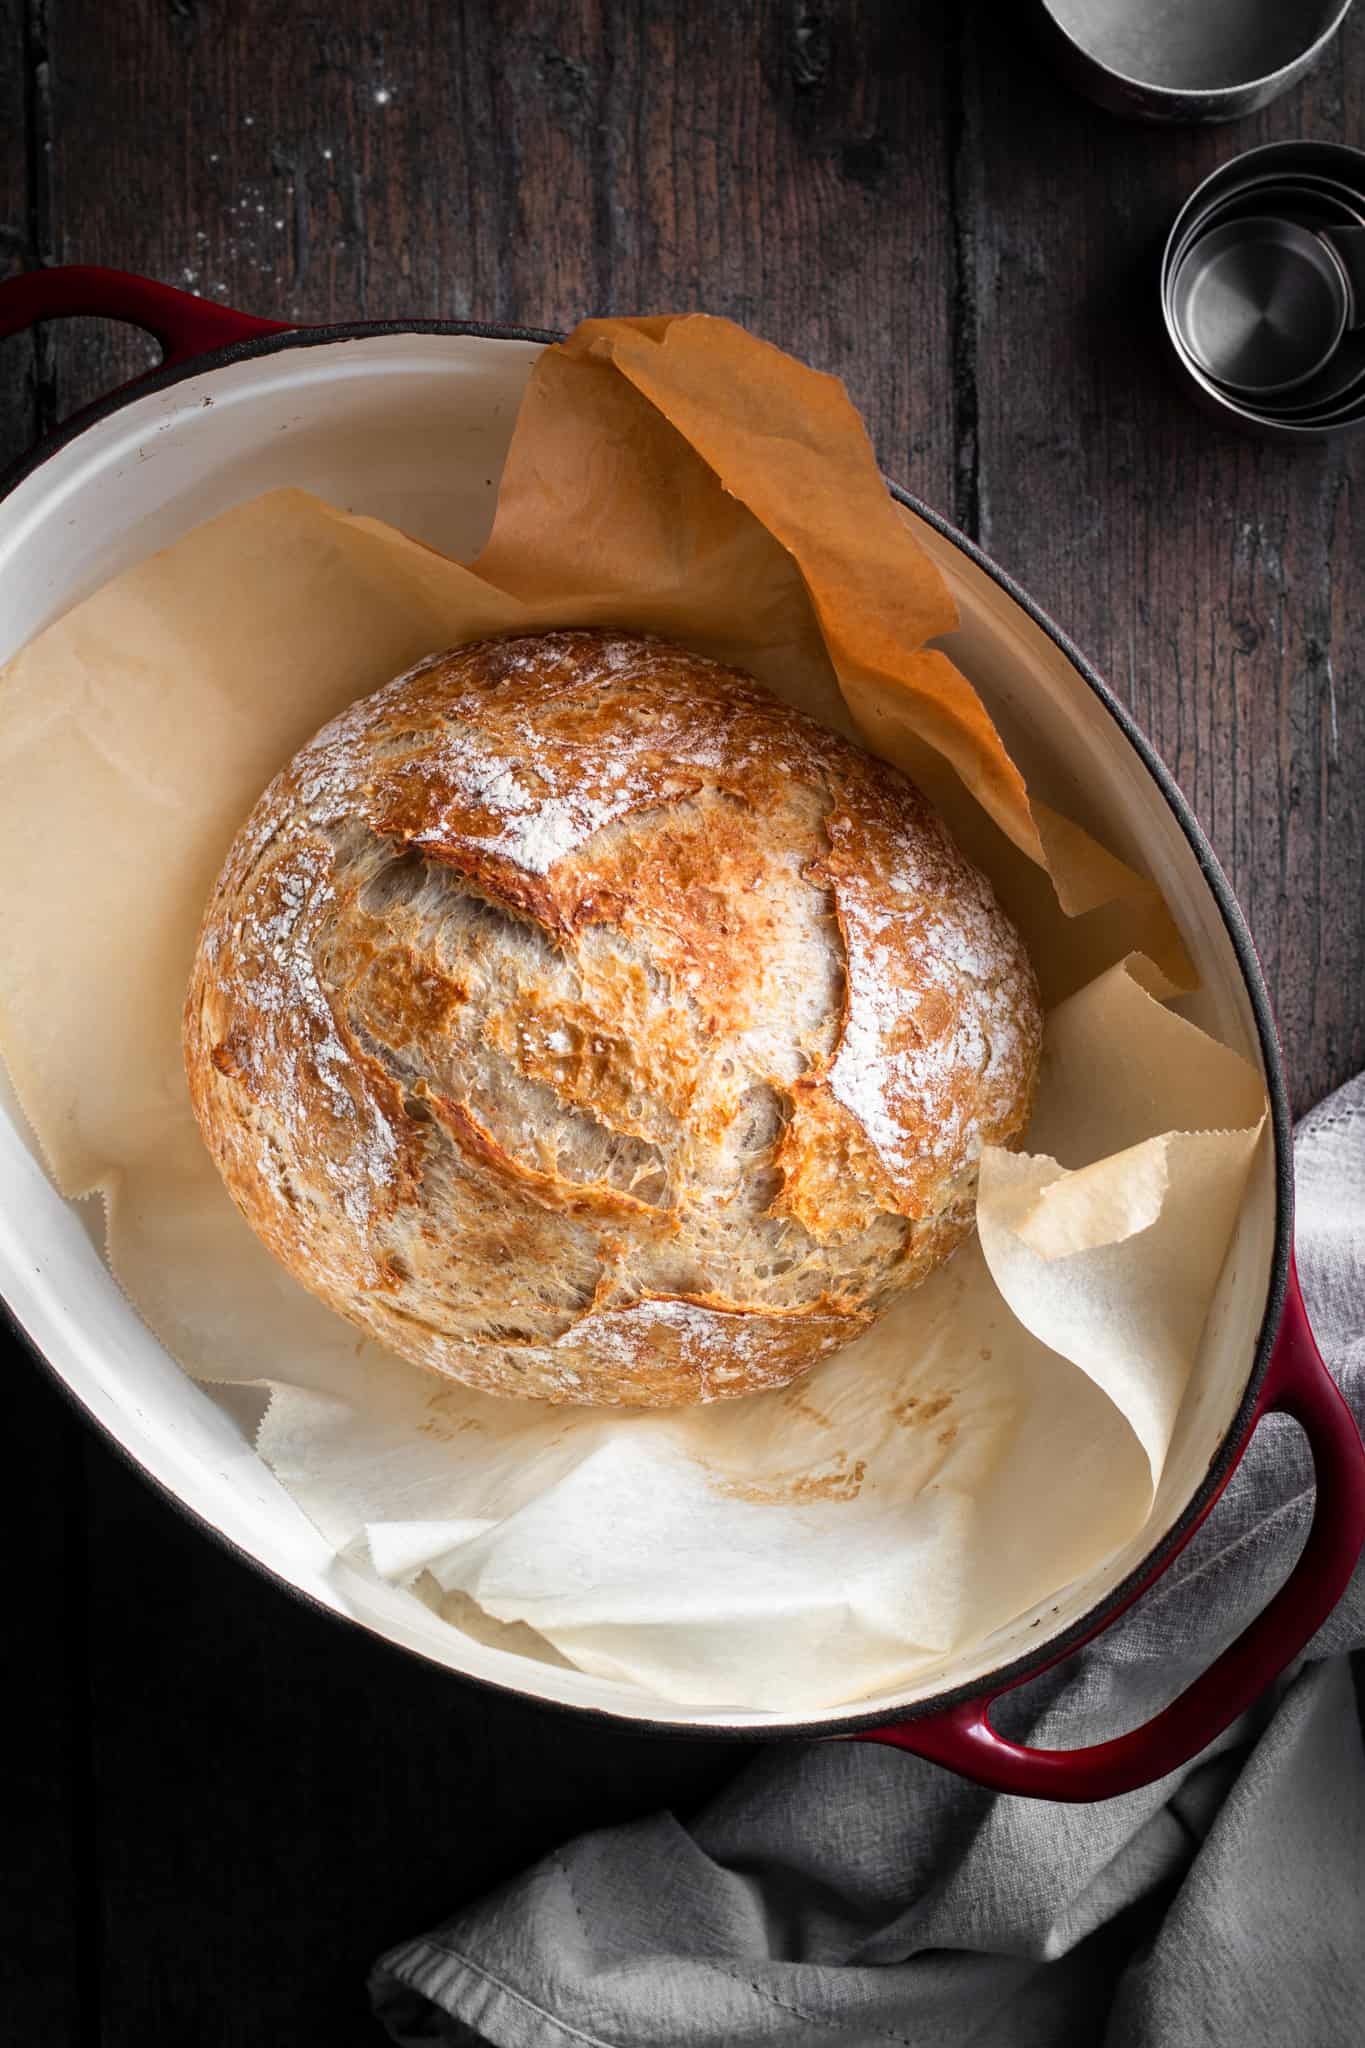
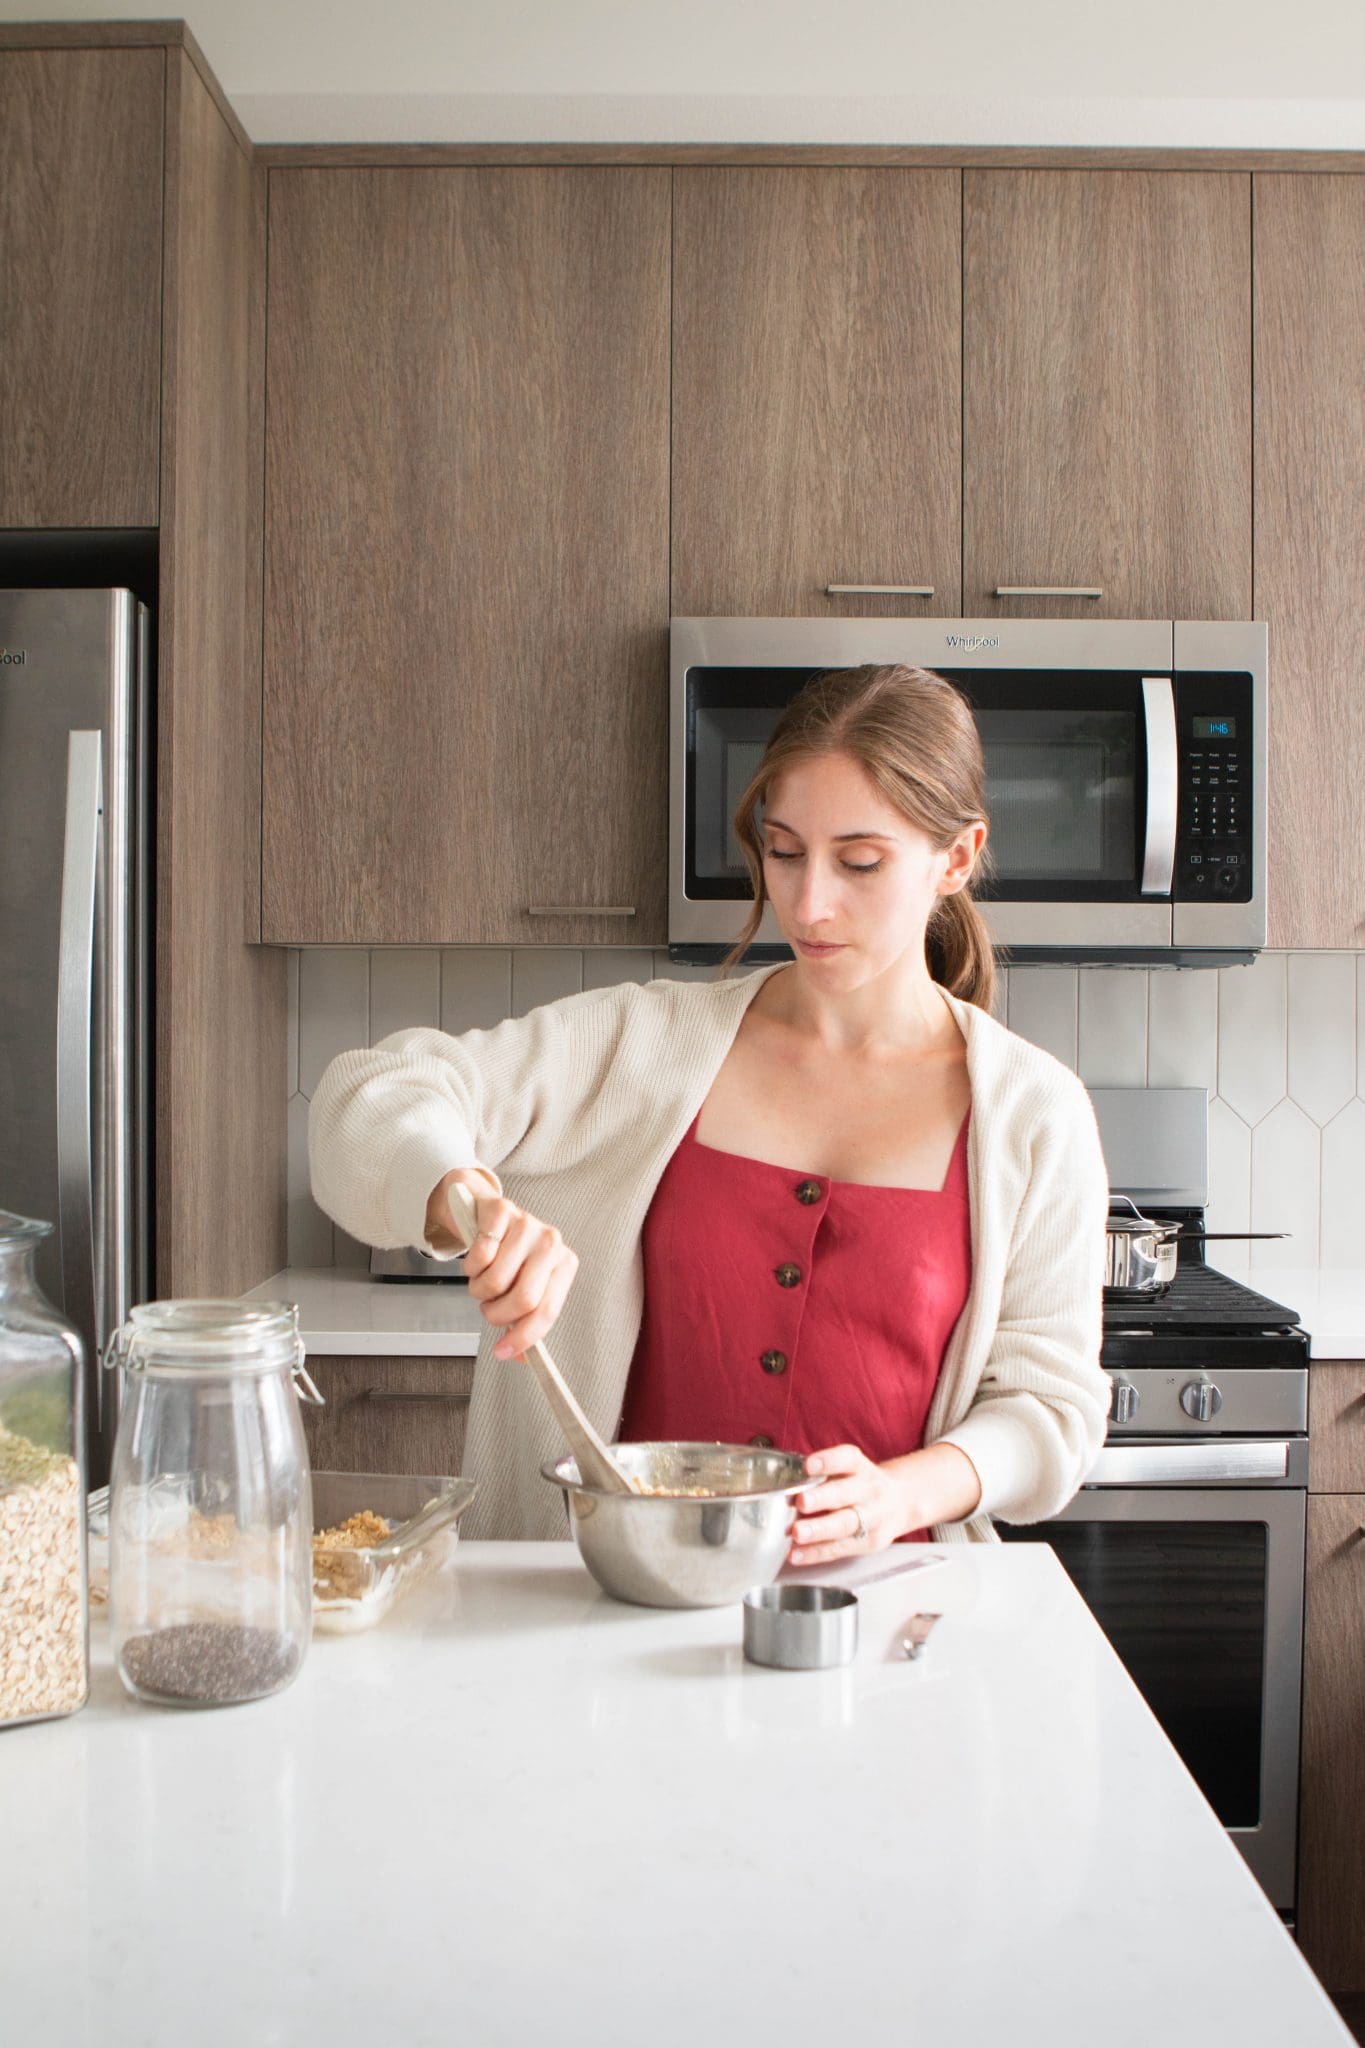
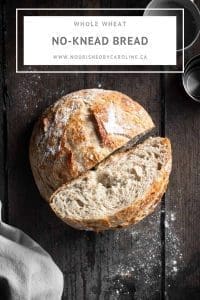
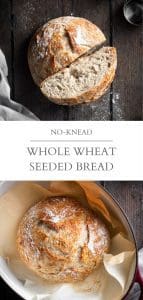
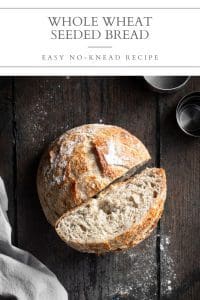
No-knead whole wheat bread. An easy bread recipe made with whole wheat flour! There’s no kneading involved, simply let the bread rise overnight. You also have the option to make it a sandwich loaf or a seeded loaf.
What could be cozier than baking a fresh loaf of bread on a snowy or rainy day?
While everyone has been making sourdough bread, I’ve been busy perfecting my no-knead bread.
If you’re new to bread-making or if you’re looking for a quick and easy bread recipe, this one is for you. There’s no better way to start than with a no-knead bread.
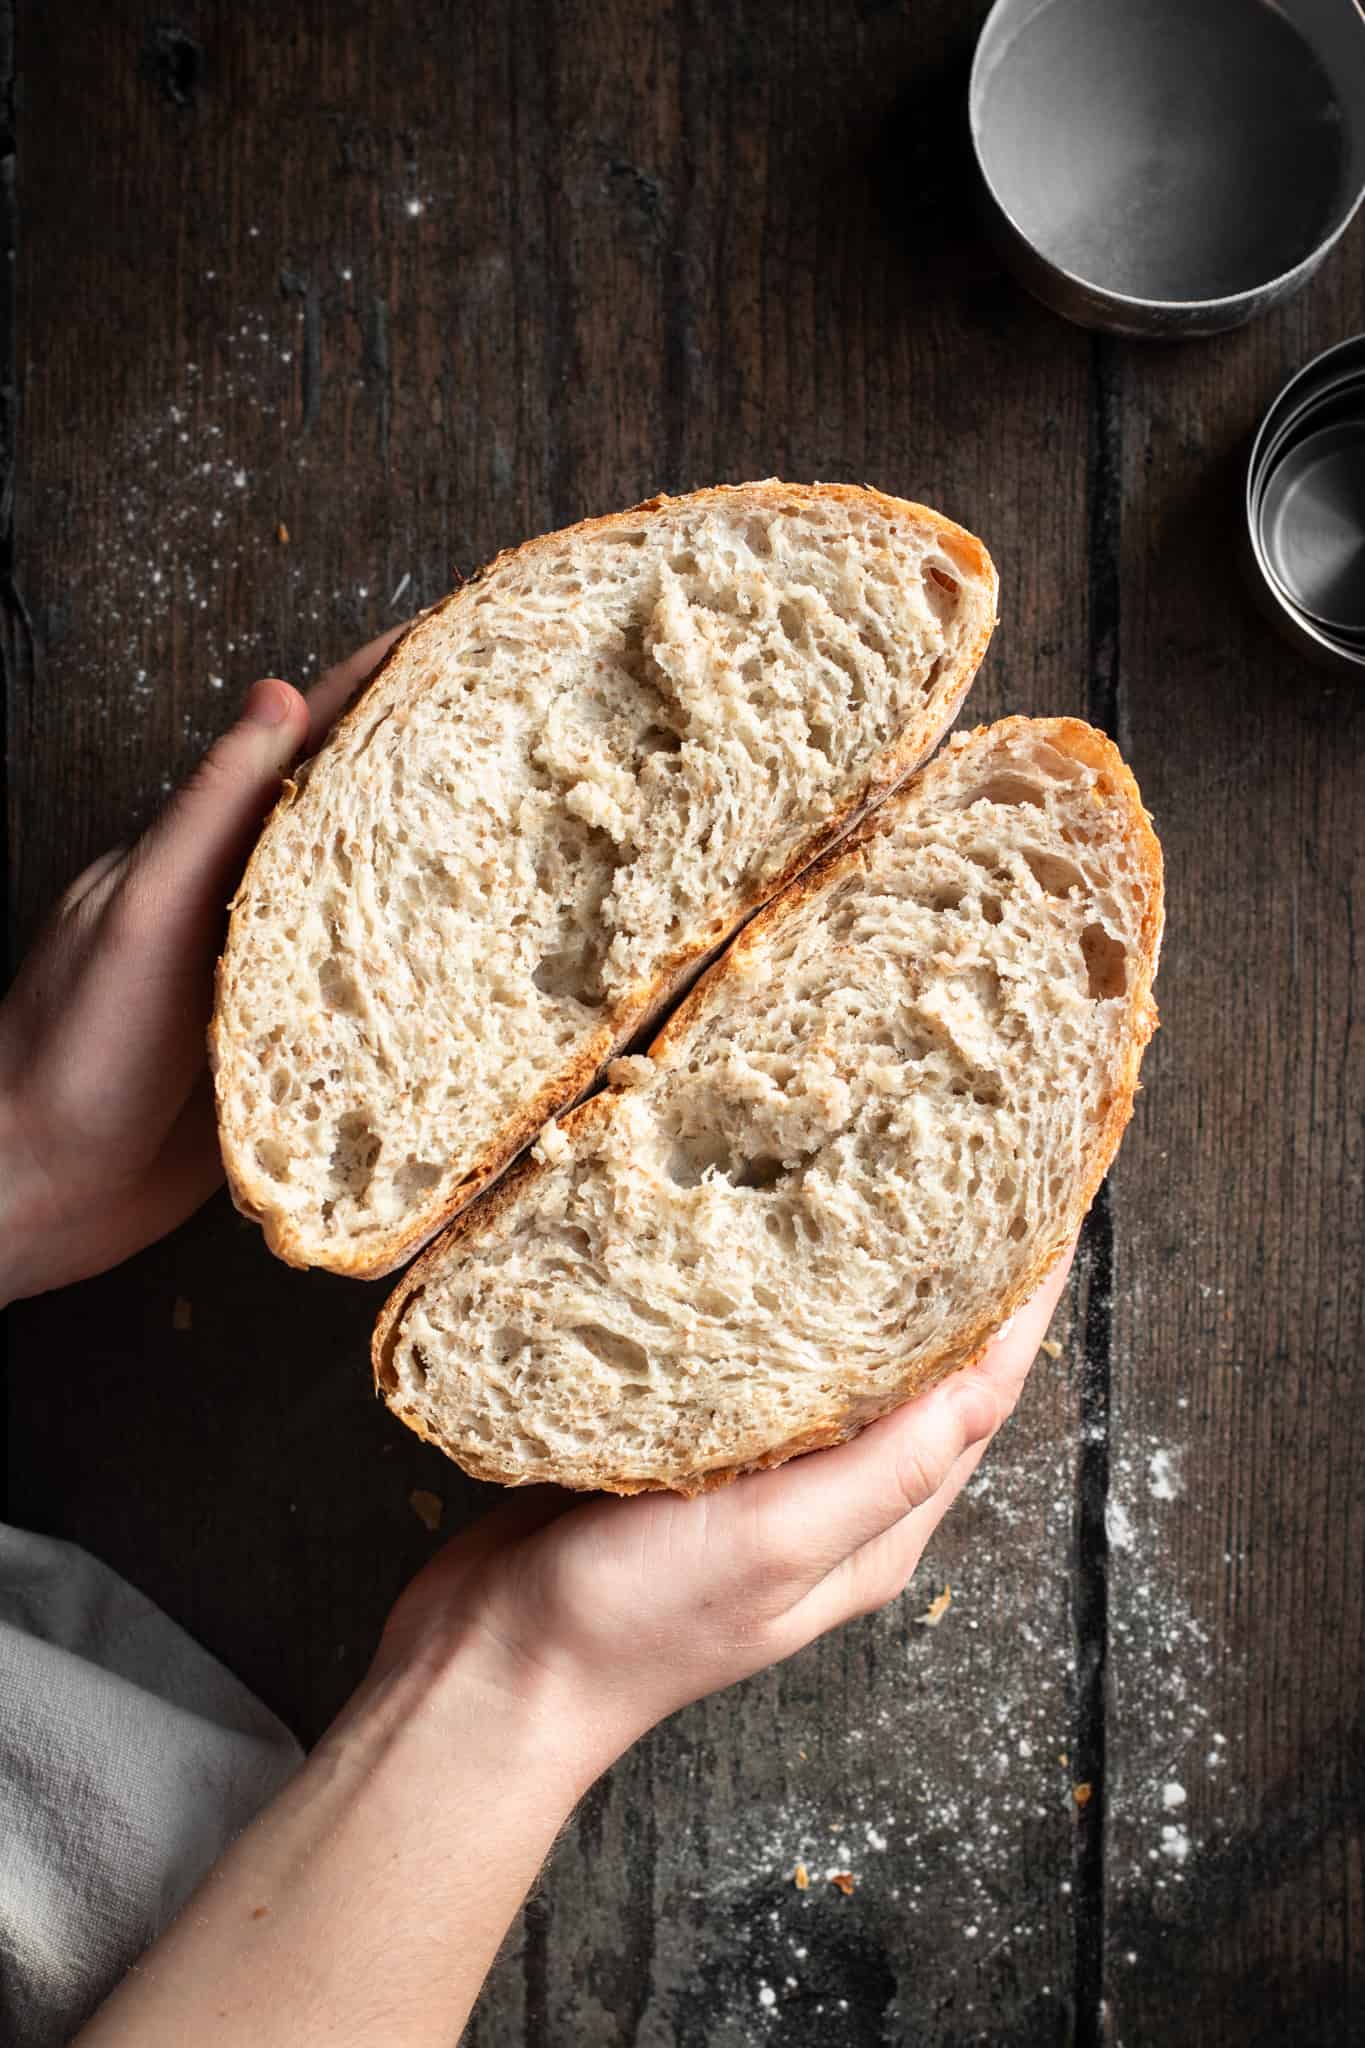
This recipe is made with whole wheat flour and optional seeds. You also have the option to make it using white flour. The end result is very similar. The only difference? The whole wheat loaf will be just a bit more dense, which is to be expected with whole wheat bread. But trust me, it’s still a delicious hearty loaf!


Here’s a step-by-step guide to making homemade no-knead bread.
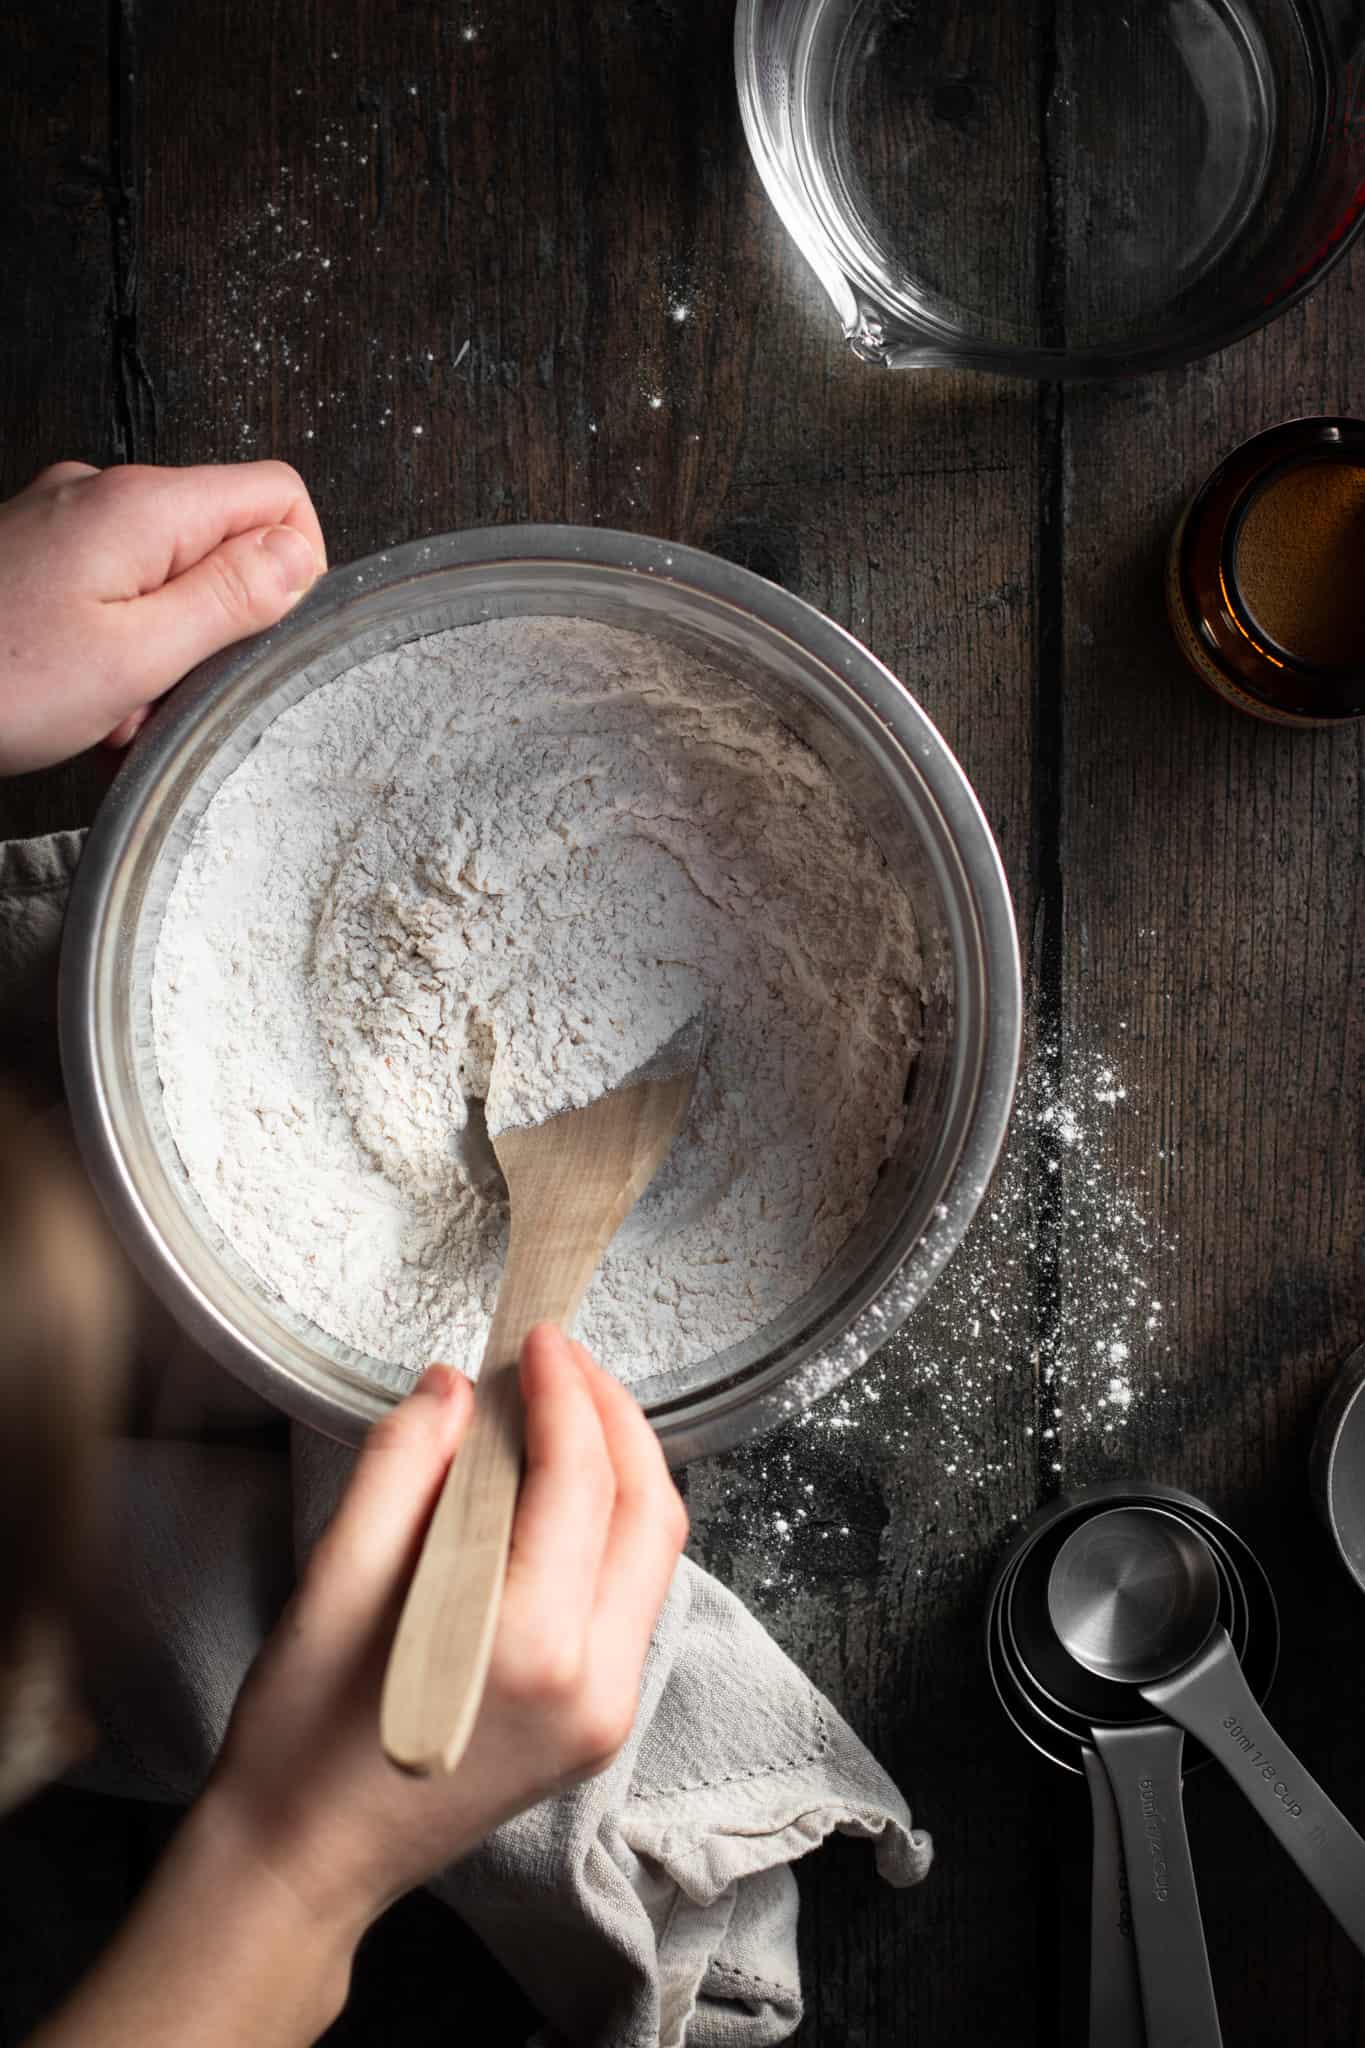
Start by combining the flour, instant yeast and salt in a large mixing bowl. Stir in the water until a thick dough forms, making sure all the flour is incorporated.
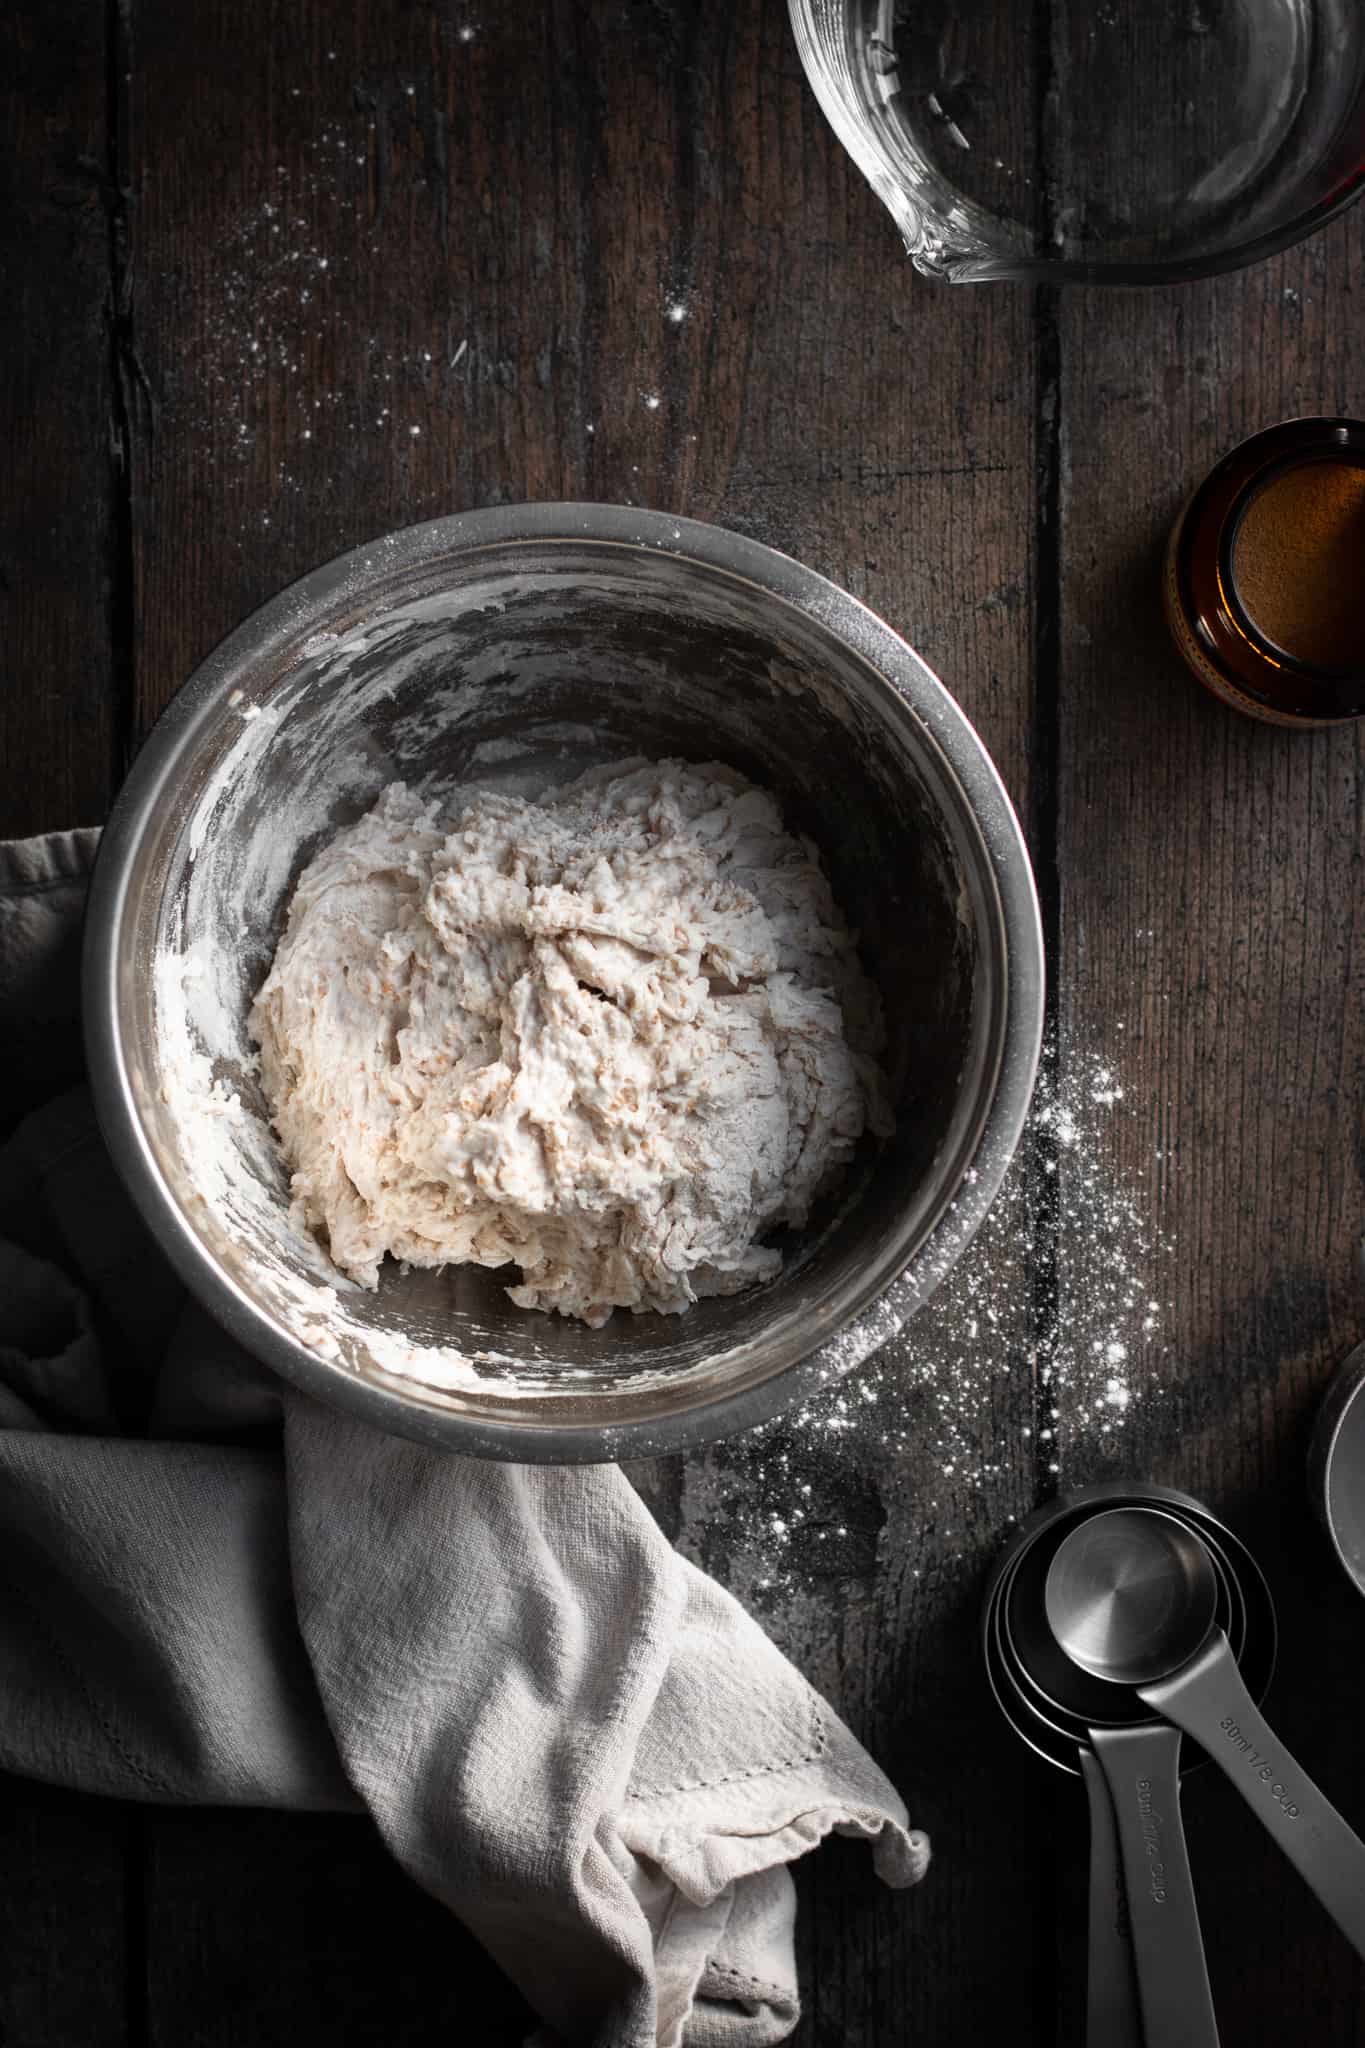
Cover the bowl with a reusable bowl cover or plastic wrap and let it rise for 12 hours or overnight at room temperature. The dough will look a bit weird, but this it normal!
The next morning, your dough should be significantly bigger and should have bubbles. It will be very humid, but that’s okay. With floured hands, scoop out the dough and form a ball.
With this recipe, you have the option to bake the bread into a round loaf or a sandwich loaf, both using the same ingredients. The two methods will result in a delicious loaf with a crispy exterior and a soft interior.
Dutch oven round loaf: Here, you bake the bread in an enameled Dutch oven. The Dutch oven is placed in the oven while it preheats, the bread is then cooked for 30 minutes covered and 15 minutes uncovered.
Sandwich loaf: There’s no need to preheat the loaf pan. The bread is simply transferred to the pan and baked for 35 minutes, uncovered.

Yes! This recipe works with all-purpose white flour, as well as all-purpose whole wheat flour. It also works with bread flour if that’s what you have on hand. You can make the recipe entirely with white flour, or you can use a combination of white and whole wheat flour. My go-to is a half and half loaf. Using white flour will make the loaf lighter, while whole wheat flour will result in a hearty (but still delicious) whole wheat loaf.
I haven’t tried making a gluten-free loaf, so I can’t guarantee the same results. However, if you want to try it, I would recommend using a 1:1 gluten-free flour mix.
That could be caused by a few things. First, make sure to use fresh instant yeast. If your yeast is old or expired, you won’t get the same results. Also, make sure to measure the flour correctly, using the spoon and level method, as instructed above (or weigh the flour).
I hope this recipe convinces you to try homemade bread. Trust me, it’s so much easier than it looks!
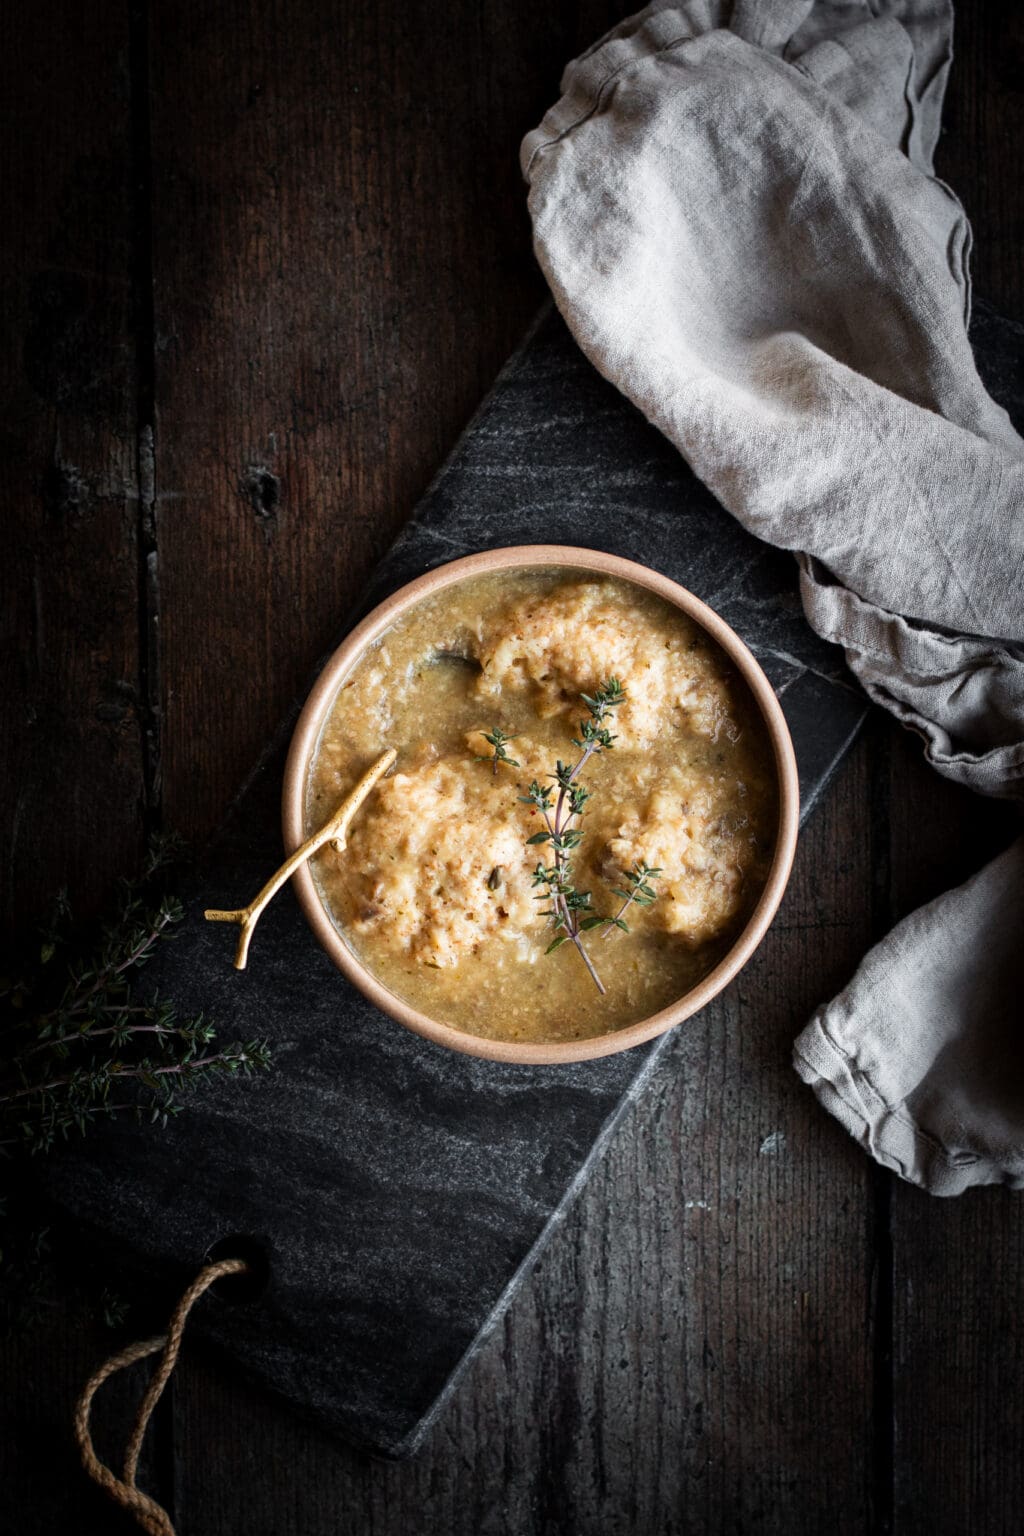
Serve this bread with a cozy bowl of soup, such as my quick vegan cream of mushroom soup, vegan cheesy broccoli soup or a simple lentil soup.
Still not convinced? Watch how easy this bread recipe really is.
If you make this no-knead bread, be sure to leave a comment and/or give this recipe a rating! I love to hear from you guys. And of course, if you try this recipe, don’t forget to tag me on Instagram!
This post contains affiliate links. I only share products that I trust and recommend. Choosing to use these links helps to support me and this blog. Thank you!

I’m Caroline, a registered dietitian based in British Columbia. Here, you’ll find a variety of nourishing vegan recipes, without a side of diet culture
don’t miss a recipe


search recipes
Can you double this recipe?
It may work, as long as you make two different loafs out of it. I’m not enough of a bread making expert to answer for sure though. Sorry! I only tried this version with success. I’ll update the recipe and let you know if I try though!
Thank you Recipe
My loaf is proving now! I only had hemp seeds so that’s what I threw in. I’ve made a lot of no-knead white bread lately and am thrilled to find a wheat recipe. Thank you!
I want to use a loaf pan. What size did you use? I know different sized loaf pans require different cooking times.
Looking forward to baking tomorrow!
Hi Amy, I hope you’ll love it!! I used a 5.5″ wide, 9.5″ long and 2.5″ tall dish (I had to measure, hah!). I would suggest using a metal loaf pan as I’ve recently gotten feedback that a glass dish didn’t work well. I hope this helps and I hope you’ll love it! 🙂
![]()
This bread is so delicious!!
I’m so happy you like it! Enjoy. 🙂
This bread is so delicious and the recipe is perfect as written. The texture is so good and the bread has depth of flavor. I ended up using the exact pan you recommended and it baked beautifully. Thank you for sharing the recipe!
I’m so happy you liked it! Thank you for taking the time to leave your feedback. Enjoy! 🙂
Every time I have made this bread, I the dough never rises..? I know the recipe calls for the dough to rise for 12 hours and it should form bubbles. Mine literally rises maybe 1 inch, and then nothing? I have tried this 8 times now, and have never had any luck. I’m not sure what I’m doing wrong? Is the yeast that I bought, bad?
Hi Prue, I’m so sorry to hear that you didn’t have any luck with this recipe. Bread is definitely tricky to make and can easily be affected by small changes.
A few things that come to mind: Your yeast might be bad like you said. It would be worth trying with a different batch, making sure you’re using instant yeast/quick rise yeast (not active dry yeast). Active dry yeast needs a longer rising time and should be dissolved in liquid until it foams before adding the dry ingredients (you would usually add sugar to the liquid as well). This recipe was tested with instant yeast only. Other things to consider: Are you in high elevation or at sea level? High elevation might affect the results. And is your room temperature cold? The bread will rise faster in a warmer environment. If your room temperature is colder, the dough might need longer to rise. And if you’re using white flour or a mix of whole wheat and white, the dough will rise more. 100% whole wheat bread will not rise as much and will be a bit more dense, which is completely normal. Finally, make sure to spoon and level the flour. If you scoop the flour directly with the measuring cup and/or shake the cup, you will end up with too much flour.
I hope this is helpful! Let me know if you have more questions. Best of luck and thank you for your feedback!
![]()
This bread is SO EASY! It also is really yummy and tasty!
Thank you! I was going for something as easy as possible. 😉 I’m happy you liked it!
![]()
As a beginner , this was a perfect non fussy recipe. I was very apprehensive but it turned out so well. I used 2 flour and 1 whole wheat. Thanks so much
I’m so happy you loved the recipe Shefali! Thank you for the feedback. 🙂
I haven’t made the bread yet so I can’t rate it but I’m looking forward to trying it and the recipe looks very nice. One comment; why don’t you also include a weight measurement for the flour to get it exactly right if one has a scale.
Hi Debby, I hope you’ll enjoy this recipe! I’m actually in the process of improving and updating this recipe. I will have the updated post up in November 2020. Thank you for the feedback, I will make sure to include the flour measurements in the updated recipe. I hope it will help!
![]()
OMG
le pain est excellent et tres simple et facile a faire.
Cette recette sera parmis mes favoris
Merci Caroline
Merci beaucoup Gisèle! Je suis contente que tu l’aimes. 🙂
this recipe looks delicous. in the picture did you use 100% whole wheat flour? it looks so light and airy,,,,
can i make it on a baking tray instead of a bread pan?
thank you
Hi Rachel, thank you so much! In the loaf pictured, I used 2 cups of whole wheat bread flour and 1 cup of white all-purpose flour. I haven’t tried baking it on a baking sheet. It will likely flatten and won’t be the same as a sandwich loaf, but it’s worth a try! For the best result, I would suggest a bread pan though. 🙂
I made this bread, with minor variation of using 300 grams whole wheat flour/100g unbleached “white” flour & putting it in oven with the light on (I keep my home a bit cool) instead of at room temperature.
I baked it in a metal loaf pan.
The dough didn’t rise as much as I hoped & was a bit dense. Could this be due to altitude (4800 ft)?
Hi Rodger, The altitude could certainly be the cause! The bread has been tested at sea level and at an altitude of about 1300ft. I haven’t tried it in a higher altitude. I don’t have a specific suggestion as it would take some testing. Sometimes using less yeast or more or less flour can make a difference.
I’ve been searching for a completely whole grain bread with nuts and seeds that doesn’t contain animal products and isn’t complicated. This seems perfect and I can’t wait to make it.
Since this is a no knead bread can you please explain how to incorporate the nuts and seeds after the dough has risen the first time? Do you just sprinkle and fold a few times?
I really hope you’ll like it! And you add the nuts and seeds after the dough has risen the first time. I simply sprinkle them on top and fold the dough a few times like you said. You can also form a well in the dough and add the seeds there before folding it a few times. Make sure they’re well incorporated. 🙂
Hi! I would like to ask if after letting it rise for 12 hours and after shaping the dough, do I need to let it rise for the second time while the oven pre-heats?
Hi! If you’re making the round loaf, you don’t need to do a second rise. If you’re making the sandwich loaf, you can do a second rise in the bread pan while the oven preheats or for up to 1h. This can help with the shape of the bread, but to be honest, I don’t always bother doing this and the bread turns out well. 🙂
Love the bread! I made exactly as you explained and I am so proud of myself !!!
Do you have any other recipe with rye flour ?
Thank you!!!!
I’m so happy you like it! Thank you for taking the time to leave your feedback. And unfortunately I don’t have any recipes using rye flour. It’s not something I often use, but I will definitely keep that in mind for future recipes. Thank you!
I am brand new to baking homemade bread, and I’d love to give this recipe a try. I have a 2qt Dutch oven, but will the small size of the oven impact how the bread will rise in the oven?
Using a smaller Dutch oven shouldn’t impact the baking time, as long as the bread fits. 2qt is on the small side (I use a 5qt), but it could fit. It might just take the shape of the Dutch oven. It’s worth a try! Sorry that I don’t have a specific answer as I haven’t tested it in that smaller size.
![]()
For such a simple recipe, this bread turned out great!! Definitely a quick-fix option for warm, homemade breakfast bread. I look forward to trying it in a dutch oven (I don’t have one yet), but it was still good in a loaf pan. Thanks for sharing!
I’m trying out this recipe for the first time. It’s in the oven now, but my dough was very wet and would not form a ball. I know I measured everything as directed. I can’t figure out what is causing such wet sticky dough. I just said her the parchment paper into the Dutch oven, hoping for an edible bread.
Any suggestions on how to form a dough ball greatly appreciated!
Hi Cristina, I’m sorry that the dough turned out too wet. I’m not sure what could have happened, but I would recommend next time to knead the dough with more flour until it forms a ball. The dough shouldn’t be dry and it will be a little wet, but it should be able to form a ball. Also, you could try adding a small amount of extra flour to the dough before rising next time. I hope this helps!
What’s the max amount of time I can let this rise?
I typically don’t let it rise for more than 12-14 hours. I have tried waiting longer before and it didn’t turn out as well. I hope this helps!
![]()
Giving 4 starts only because I haven’t tried it myself it’ll be my first time making bread at all and I’m super excited and judging on the comments I can’t wait..my question is..could cinnamon and honey be added to this recipe to make it a sweet bread possibly?
Hi Amber, thank you for the review. I can’t say for sure that these additions would work. As honey is a liquid sweetener, I would be hesitant to add it as it might affect the texture of the recipe. Instead, my recommendation would be to carefully follow the recipe, then serve the bread with a drizzle of honey and a sprinkle of cinnamon. I think that would be delicious!
Does this bread rise without any gluten? Wheat flour usually needs some gluten to help rise.
Hi Sam, yes, the whole wheat flour does make the bread rise nicely in this recipe. That being said, it will rise even more with white flour or a mix of white and whole wheat, which I love doing. The 100% whole wheat loaf is still great though, just a little more dense as you would expect. 🙂
I have made this bread a number of times. I follow the recipe and have never had a problem with the rise.
Thank you for the review Amy! I’m happy you don’t have any issues with the recipe. 🙂
Can you replace the sunflower seeds by oats?
The oats might make the bread a little more dry as it will absorb some of the liquid, unlike the seeds. I would recommend simply skipping the sunflower seeds and/or just adding a sprinkle of oats on top of the bread before baking (not mixing it in the dough). I hope this helps!
My wife and I have been making no knead bread with bread flour for a few months now and, as you stated, it important to spoon out the flour. However we found a little twist that helps make the bread a bit lighter. Before you spoon the flour out, as I called it, aerate it. We did this by fluffing it with the larger spoon just before spooning into the measuring cup. It made a pretty big difference…much lighter and softer inside.
Have fun. Bon Appétit!
Thank you for the extra tip Don! I’ll have to try it as well next time. 🙂
![]()
The receipe works. The bread is good!
However, I tried this receipe a couple of times by following the the exact steps and measures and it seems that the batter, after the 12 hour interval, is too sticky and too gooey to make it into a ball. I ended up adding a lot more flour and I also had to knead it. Any idea what the issue might have been?
Thank you for the feedback, I’m happy that you like the bread! It’s normal for the dough to be a bit sticky after rising and I typically sprinkle a bit of flour on top and on my hands before forming it into a ball – I will add this extra note in the recipe. That being said, I don’t usually need to add more flour than that. It might be a difference in room temperature and/or elevation? Also, if you used the cup measurement, you could try weighing the flour instead to see if it makes a difference. A slightly different method of scooping the flour can make a difference. And if this doesn’t help, I would recommend adding a small amount of extra flour when mixing the ingredients, then adding flour to your hands to help shape the bread (and sprinkling a bit of flour on top of the dough if needed). I hope this helps a little!
why do you add the seeds after the long rise and not as part of the long slow rise?
Both options work, but I find that adding the seeds during the overnight rise causes them to get a bit soggy. By adding them after, it keeps them fresh and crunchy. I hope this helps!
Hi Caroline,
I’ve tried the recipe about six times, with different combinations of whole wheat and bread flour, and also just all-purpose. My dough is always wet and sticky, and I couldn’t form a ball either. I’ve tried reducing the amount of water, just a little, but it was still the same. The bread in your video looks so soft on the inside, and mine is rather heavy. I live in Dallas. If there’s anything I can do differently, please let me know. Thank you.
Hi Tam, I’m sorry that the recipe hasn’t been working for you. It looks like Dallas is at a lower altitude than where I live (131m vs 600m). However, I have made this at a lower altitude with no problem. It’s normal for the dough to be a bit sticky, but it should form a ball – It’s okay if it doesn’t hold perfectly, as long as the bread rises a bit and has the texture that you want. A few things that you can try (if you haven’t already): Add a sprinkle of flour to the dough the next morning and use floured hands. You can knead the dough with the extra flour a few minutes (I know this is a no-knead recipe, but it might help in your situation). Continue to add more flour and knead until you can just form a ball. Just add as little as you need to avoid having a denser loaf. Also, make sure that you’re measuring the ingredients correctly and that you’re not using expired or old yeast as this can affect the results.
Also, in the video and photos, I used half all-purpose white flour and half all-purpose whole wheat flour. If you use 100% whole wheat flour, it’s normal for the bread to be a bit denser and heavier, as most whole wheat loafs are. I hope that this helps a little!
Hi Caroline,
I will try using more flour while working the dough into a ball. Thank you.
Tam
Hi Tam, I hope will help! Let me know if there’s still a problem.
![]()
Thank you for your recipe.
Looking forward to trying it.
If I want to make half portion, do i just simply cut all ingredients in half?
1/4 tsp yeast seems so little… so just wanted to check…..
Thanks!
Hi Shalimar, I haven’t tested a half batch of the recipe, though I will say that the bread isn’t very big and leftovers can be sliced and frozen. If you still want to make a half batch, my recommendation would be to use half of each ingredient to start with. If the bread doesn’t rise enough, you could use a bit more yeast next time. You don’t need a lot to make the bread rise though. I actually tried it with more yeast and it didn’t turn out as good and fluffy. I also would recommend using a Dutch oven (it’s okay to use a big one) and make a round loaf if you’re making a half batch. You could start with 15 minutes covered and then bake uncovered as needed until the crust gets golden and crispy. You could keep an eye on it and start with less than 30 minutes for sure. I’m sorry that I don’t have a clear answer as I haven’t tested it myself, but I hope that this helps. Enjoy! 🙂
![]()
To continue my question above…
& what should the baking time be?
Also, what size pan should I use?
sorry for so many questions…
Newbie in baking bread… 🙂
![]()
Thank you so much Caroline for your advice.
Greatly appreciate & will try ☺️
![]()
Thank you much for your advice Caroline.
Greatly appreciated & will try!!
You’re very welcome, I hope that you’ll enjoy the recipe! 🙂
![]()
Hi Caroline,
Just wanted to let you know the half batch worked 🙂
Followed your instructions to the T & result was wonderful.
Thank you so much for sharing your recipe & advice.
Thank you so much Shalimar! I’m so happy that the half batch worked. Thank you for sharing! 🙂
Hi is it okay to bake at 350 instead of 450? Thank you
Hi Lizbeth, sorry for the late reply. I don’t recommend changing the temperature as it might affect the cooking time. You can try it if you want, but I can’t guarantee good results as I haven’t tried it. Sorry!
I have made this recipe 3 times now. The last two times I have doubled the recipe and it turns out great. I have increased the amounts slightly , as I bake in loaf forms and I like a bigger loaf.
7 cups flour /12 and 1/2 white and ww; 3.5 cups water; generous 2 tsps. salt.; 2.5 tsp. instant yeast. Then adding a little flour on the counter when shaping the next day. (also add seeds at this time) It will be my go to bread baking recipe for a while.
Thank you so much Helmi! I’m happy that you’re enjoying the recipe. And thank you for sharing your adjustments, I’m sure it will help others as well. 🙂
I am a complete novice and made the bread….it was very easy and it was almost perfect. Just a little burned on the bottom. Should I drop the temp to 425 or shorten the time a little? Suggestions…? YUM.
Thank you, I’m so happy that you enjoyed it! Every oven is a bit different. I would recommend baking it at the same temperature, but baking it 5-10 minutes less. You can check on it every few minutes for the last 15 minutes after removing the cover. It should be golden, but not too dark. I hope this helps!
This came out great! I used white whole wheat bread and sesame seeds. Thanks so much for this receipe!
Thank you Jamie, I’m so happy you liked it!
Perfectly simple, this is going to officially replace my store bought bread. The bottom of my bread burned though, I used a Dutch oven. I also took it out 10 minutes early (only 5 minutes with the lid off). Any idea what might cause this? I have had this happen before when making bread. Thinking about trying 425 degrees next time? I think my oven may run hot.
Hi Dawn, thank you for the feedback, I’m happy that you enjoyed the recipe! It could be that your oven runs hot, many ovens have slight variations. You could try it at a lower temperature. Also, I use an enameled cast-iron pan that’s on the light side. A dark cast-iron pan could cook the bread a little differently. You could try cooking for a bit less time as you did. Another option could be trying it without preheating the cast-iron. I can’t guarantee that these changes will work, but I hope that it helps!
I have a bread warming pad that I keep at 86 F. How long do you suggest I proof the dough for? My house temp ranges from 68-70 F.
Hi Lindsay, I made the recipe in different temperatures. Our old house was often kept around 18C (64.4F) and I let it proof overnight for about 12 hours and it came out well. Our house is now at a similar temperature to yours and the results are the same for me. I unfortunately can’t recommend a specific time using the bread warming pad as I don’t have experience using one. Sorry for the inconvenience!
Can I cut this recipe in half?
Hi Dee, I haven’t tried making a half batch myself, but someone did try it with success. You can find details in the comment section, but to summarize, I would recommend cutting the measurements in half and using the Dutch oven method, not a sandwich loaf. Start with 15 minutes covered and then bake uncovered as needed until the crust gets golden and crispy. Keep an eye on it and it should be done in less than 30 minutes. I hope that this helps!
I’ve made this twice now with the same results, great when fresh, but soggy the next day. First time I made it in a loaf pan, next time I bought a 5qt dutch oven, same result & a flatter loaf.
Hi Jaqueline, I’m so sorry to hear that the bread didn’t turn out as planned. The loaf is definitely best when fresh and it does get a bit softer on the second day. Combining the whole wheat flour with some white flour does help a little with this. White flour can replace whole wheat flour on a 1:1 ratio, so if you want to give it a try, I would recommend adjusting the ratio until you find one that you like. I hope this helps!
![]()
Can I use half 00 flour and half whole wheat flour? If I go over the 12 hour rise period should I put the dough in the fridge and then take it out in the morning to make the bread? I like to mix the dough at 10 am and just do not want to bake at 10 pm. Thank you for advice.
Hi Denise, you should be able to use half 00 flour and half whole wheat. I have not used 00 flour myself though, so I can’t guarantee the same results. As for refrigerating the dough, it should work. I would recommend keeping it at room temperature for an hour before baking. If I try it myself, I will update the recipe. It’s definitely worth a try!
What temperature does your parchment paper used say is the maximum temperature? I cannot fine paper that can handle 450 degrees and I use the Dutch oven. I am afraid if the paper catching fire at this temperature.
![]()
Just finished making this and it came out perfectly! It was still nice and light even with using all whole wheat flour. I did add a second rise for an hour before baking in the dutch oven though. It was such an easy recipe I plan on making this every few days!
Leave a Reply